• Skip to main content
  • Skip to primary sidebar
Listen to the Latest Podcast EpisodeAnd We’re Back! Introducing: Diabetes Digital
Food Heaven Made Easy

Food Heaven Made Easy

Black Registered Dietitian Nutritionists | Intuitive Eating Dietitians

  • About
  • Press
    • Diabetes Digital
    • Start Here
    • Podcast
      • Hookup Codes
    • Work With Us
    • Resources
      • Recipes
      • Blog
      • Cookbook
      • Books We Love
    Looking for nutrition counseling with expert registered dietitians?
    Get Started

    Wendy

    Cherry Jam w/ Whipped Cream & Pistachio Crust

    July 30, 2019 by Wendy 1 Comment

    Disclosure: This post is sponsored by Northwest Cherry Growers. Thank you for supporting the work we’re doing at Food Heaven! 

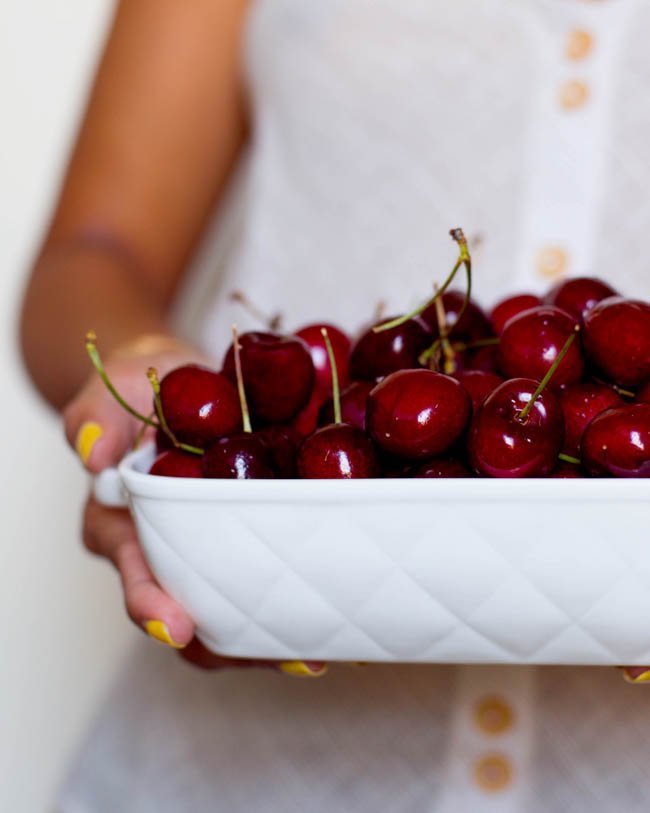
    The summer is here, which means a wide variety of beautiful produce at the farmers market! Sweet cherries are one of my favorite fruits, and once they’re in season, I like to stock up because the cherry season is relatively brief. Fresh northwest-grown sweet cherries are usually only available nationwide from late-June to August, so you gotta get them while you can! I like to freeze cherries while they’re in season so I can enjoy them year-round, and then add them to smoothies or jam recipes.

    Aside from being perfectly sweet, cherries have a lower glycemic index than almost any other fruit, which means they release glucose slowly and evenly – helping you maintain a steady blood sugar level. Cherries are also a natural source of melatonin, which helps control your body’s internal clock and regulate your sleep patterns. Try eating cherries about an hour before bedtime to help stabilize your sleep cycle.

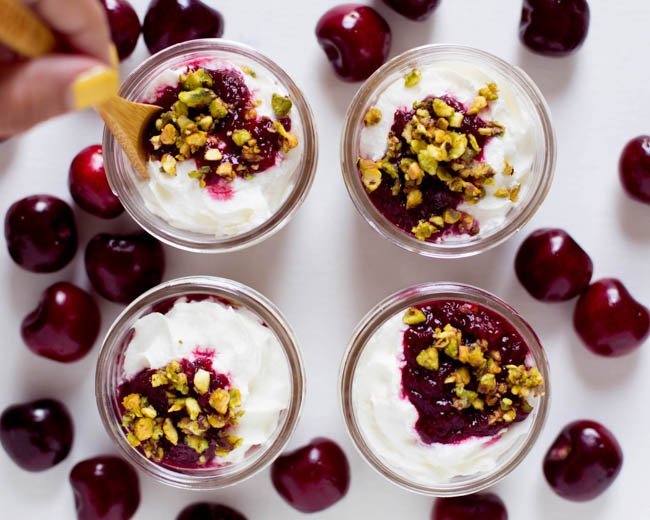
    Also, for those of you wanting to boost your fiber intake, cherries are a delicious way to go! Incorporate cherries into your 2 cups a day of recommended fruit to help meet your fiber needs. I could keep going with why cherries are awesome, but I’m sure you’re wondering about this recipe. It’s so. so. good. Inspired by one of my favorite Boston desserts at Tatte bakery, I whipped up a pistachio oat crust, and then layered it with sweet cherry jam, whipped cream, and crushed pistachios. Yes, it’s heavenly. Best part is that the recipe is pretty straight forward and healthy. Let’s get started!


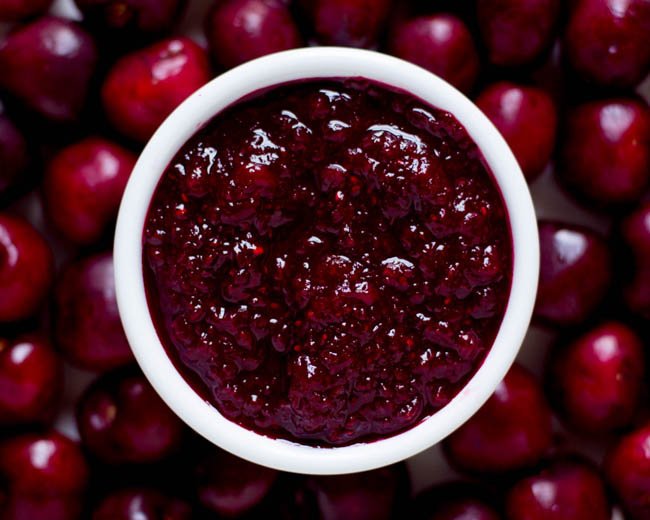
    Blend the sweet cherries and chia seeds together. Add to a small pot and cook over low heat for 5-7 minutes. Pay attention so it doesn’t burn! Allow to cool down, the texture should resemble a jam. While that’s happening, add the pistachios, oats and maple syrup to a food processor. Process until consistent and scoop into a bowl. Press the pistachio crust evenly to 4, 4oz jars, layer with the cherry jam, and top with whipped cream. Finish off by topping the whipped cream with leftover jam and crushed pistachios. If you want to enjoy just one or two servings now, pack the crust and jam separately, and then assemble with the whipped cream whenever you’re ready to enjoy the rest!

    5 from 1 vote
    Print
    Layered Cherry Jam with Whipped Cream & Pistachio Crust
    Servings: 4
    Ingredients
    • 1 1/2 cups cherries, stems removed and pitted
    • 1 teaspoon chia seeds
    • 1/2 cup shelled pistachios, roasted and salted
    • 1/2 cup rolled oats
    • 3 tablespoons maple syrup
    • whipped cream
    Instructions
    1. Blend the cherries and chia seeds together. Add to a small pot, and cook over low heat for 5-7 minutes. Pay attention so it doesn't burn!

    2. Allow to cool down, the texture should resemble a jam.

    3. While that's happening, add the pistachios, oats and maple syrup to a food processor. Process until consistent and scoop into a bowl.

    4. Press the pistachio crust evenly to 4, 4oz jars, layer with the cherry jam, and top with whipped cream. Finish off by topping the whipped cream with leftover jam and crushed pistachios. Enjoy!

    Filed Under: Sweets

    Sausage & Peppers w/ Creamy Yuca Mash

    July 17, 2019 by Wendy Leave a Comment

    This recipe was posted on our instagram here, but we wanted to make sure you all can see it on the site as well!

    https://www.instagram.com/p/BzTU6LCnlSC/

    Print
    Sausage and Peppers
    Ingredients
    • 4 Fieldroast Bratwurst Sausages⠀
    • 1/4 cup olive oil⠀
    • 3 bell peppers, your color of choice, sliced⠀
    • 1/2 red onion, sliced⠀
    • 1/2 cup tomato sauce⠀
    • 1 tablespoon tomato paste⠀
    • 1/2 teaspoon red pepper flakes⠀
    • 1/2 teaspoon oregano⠀
    • 1/2 teaspoon black pepper⠀
    • ¼ cup fresh basil, chopped⠀
    Instructions
    1. On a pan, heat the olive oil over medium heat, and add the sausages. Cook for 1-2 minutes on each side until the sausages get browned.⠀

    2. Remove the sausages from the pan, and add the sliced peppers and onions. Saute for 5-6 minutes with the oil, and then add the tomato sauce and paste.⠀

    3. Cook for another 3-4 minutes, then add the sausages back in along with the spices. Cook together for 4-5 minutes, turn off the heat, and mix in your fresh basil. Enjoy with mashed yuca!⠀

    Print
    Creamy Yuca Mash
    Servings: 4
    Ingredients
    • 2 1/2 pounds of yuca root, chopped into 3” chunks and peeled
    • 1/4 cup butter
    • Salt, to taste
    Instructions
    1. Bring a large pot of salted water to a boil, and add the yuca chunks. Boil over high heat until the yuca is very tender, for about 30 minutes, with the lid on.

    2. Check occasionally to make sure the water hasn't dried out. If it has, add enough water to cover the yuca and continue boiling

    3. At the end of cooking, the yuca should be super soft, and you should be able to easily put a fork through the chunks
    4. Once done, add the yuca chunks to a bowl (don't throw away the water yet!) Remove the fibrous stem from the center of the roots.

    5. Add 1/4 cup of the starchy water you cooked the yuca in, along with the butter to the same bowl, and get to mashing! You can use a pestle, potato masher, or whatever tool you like for mashing. If you want the yuca mash creamier, add more water. It'll take a few minutes, and a good arm workout!

    6. Mash in salt, to taste and enjoy as a side with sautéed red onions!

    Recipe Notes

    We sautéd our red onions with olive oil and red wine vinegar

    Filed Under: Breakfast, Main Courses

    Cheesy Spinach Pastelitos

    July 17, 2019 by Wendy Leave a Comment

    This recipe was posted on our instagram here, but we wanted to make sure you all can see it on the site as well!

    https://www.instagram.com/p/By8ngm5HEqm/

    Print
    Cheesy Spinach Pastelitos
    Ingredients
    • 10 frozen empanada disks thawed⠀
    • 1 tablespoon of olive oil ⠀
    • 1/2 onion minced⠀
    • 2 tablespoons of maple syrup⠀
    • 1/2 cup goat cheese shredded or crumbled⠀
    • 1/2 cup mozzarella cheese shredded⠀
    • 1 1/2 cup chopped frozen spinach thawed and pressed to remove liquid ⠀
    • 1/2 teaspoon of salt⠀
    • 1/2 teaspoon of black pepper ⠀
    • Vegetable oil
    Instructions
    1. In a pan, heat the olive oil and add the onion. Sauté over low heat for 3-4 minutes. Set aside. ⠀

    2. Add the cooked onions to a bowl, and using a spoon, mix well with the maple syrup, cheese, spinach, salt and pepper. ⠀

    3. Scoop the veg mix into each of the empanada disks, focusing on centering the filling in the middle. ⠀

    4. Fold over the empanada, lightly moisten edges with water, and seal with a fork.⠀

    5. Once you’re done, fill a small saucepan with enough oil to deep fry each of the empanadas. ⠀

    6. Bring to a medium heat, and cook the empanadas for 1-2 minutes, until both sides are golden, flipping once.⠀

    7. Remove from the pot, and place on a paper towel before serving. Enjoy!!

    Filed Under: Appetizers, Salads, Sides

    Kale Mushroom Gorgonzola Pizza

    July 17, 2019 by Wendy Leave a Comment

    We posted this recipe on our Instagram here, but we want to make sure you all can see it on the site as well!

    https://www.instagram.com/p/BwsK96CH7_6/

    Print
    Kale Mushroom Gorgonzola Pizza
    Ingredients
    • 1-lb pizza dough, homemade recipe is down below
    • 1 1/2 cups tuscan kale, finely chopped ⠀
    • 3/4 cup mushrooms, sliced
    • 4 cloves garlic, minced ⠀
    • 1/2 teaspoon dried oregano ⠀
    • Pinch of salt⠀
    • 1 tablespoon olive oil ⠀
    • 1 tablespoon Black Truffle Glaze or balsamic vinegar
    • 1/4 cup gorgonzola cheese⠀
    • 4 ounces of ricotta or burrata cheese ⠀
    Instructions
    1. Preheat the oven to as high as it goes (ours went up to 550F)⠀

    2. Roll out your dough into a 10-12” pizza crust, and place on a parchment paper lined baking sheet⠀

    3. Add the kale, mushrooms, garlic, oregano, salt, olive oil and truffle glaze to a bowl. ⠀

    4. Massage together and set aside.⠀

    5. Add the gorgonzola cheese to the dough, and then add the massaged kale mix. ⠀

    6. Brush the crust with olive oil, and pop into the oven for 8-10 minutes.⠀

    7. Then add the cheese and cook for another 2-3 minutes.⠀

    8. Enjoy with your favorite toppings!


    Print
    Homemade Pizza Dough
    Ingredients
    • 3 1/2 cup all purpose flour
    • 1/2 teaspoon active dry yeast
    • 1/2 tablespoon salt
    • 1 1/4 cup water
    • 1 tablespoon olive oil
    Instructions
    1. Mix the flour, yeast, and salt together in a bowl. Using a metal spoon, mix in the water and oil until all ingredients are worked in together.
    2. Then use your hands to knead the dough into a ball.
    3. The dough should be sticky enough to stick to the bottom of the bowl, but not too sticky to where it’s staying on your hands.
    4. You can add a few drops of cold water as needed, to better work the dough.
    5. Add the pizza dough to a clean bowl, cover the bowl with plastic, and allow to rise for 1-2 hours.

    6. Remove the dough from the bowl and brush with olive oil. You can either use it right now, store in the fridge for a couple days, or freeze until you’re ready to use!

    Filed Under: Main Courses

    Homemade Ricotta Cheese

    July 17, 2019 by Wendy Leave a Comment

    We posted this on our Instagram here, but we wanted to make sure you all can see it on the site as well! Homemade ricotta cheese because that’s what having a good time means (hello 30’s)??‍? I made 2 different batches, one smooth and another on the chunky side. SO damn delicious on toast, in pancakes, in pasta, as a dip, on its own…I’m hype. See below for the super easy instructions. 

    https://www.instagram.com/p/Bv194KLH7rL/

    Print
    Homemade Ricotta Cheese
    Ingredients
    • 1 quart whole milk ⠀
    • 1 pint heavy cream⠀
    • 1 teaspoon salt⠀
    • Juice from 1 large lemon⠀
    • 1-2 tablespoons of white vinegar (use the latter if you like a chunkier ricotta)⠀
    Instructions
    1. Line a large colander with a layer of a fine-mesh cheesecloth and place it over a large bowl. Secure with a rubberband. ⠀
    2. Bring milk, cream, and salt to a light boil under medium heat, stirring occasionally to avoid burning.⠀
    3. Once you have a boil, lower the heat, and add the lemon juice and vinegar. Stir for 2 minutes (you’ll start seeing it curdle) Then remove from the heat and allow to sit for 5 minutes⠀

    4. Pour the mixture into the lined colander and let it drain 1 hour. You can squeeze lightly once the hour is up to remove excess liquid. ⠀

    5. Discard the liquid collected at the bottom of the bowl, and enjoy immediately or chill the ricotta in an airtight container for up to a week!!

    Filed Under: Spreads, Condiments, Sauces

    Tomato & Ricotta Cauliflower Steaks

    July 17, 2019 by Wendy Leave a Comment

    This recipe was posted on our Instagram here, but we wanted to make sure you all can see it on the site as well!

    https://www.instagram.com/p/BvmLF0KHTJu/

    Print
    Cauliflower Steak
    Ingredients
    • Cauliflower
    • Olive Oil
    • Salt
    • Pepper
    • Paprika
    For the tomato ricotta pesto
    • 1/2 cup sun-dried tomatoes in oil
    • 1/4 cup ricotta
    • 1/4 cup parmesan
    • 2 tablespoons walnuts
    • 1/4 cup extra virgin olive oil
    • 1/4 teaspoon ground oregano
    • 2 garlic cloves, chopped
    • 1/2 teaspoon salt
    Instructions
    1. Slice the cauliflower length wise
    2. Drizzle some EVOO
    3. Add spices (we used salt, pepper and paprika)
    4. Roast @ 450F for 25 mins ⠀
    For the tomato ricotta pesto
    1. Pulse all ingredients for the pesto together. Enjoy with the roasted cauliflower!

    Recipe Notes

    We topped this batch off with Tomato & Ricotta Pesto (drooling just thinking about it). This recipe so good and E.A.SY. Make a meal out of it by serving with a protein + some carbs

    Filed Under: Appetizers, Salads, Sides

    • « Go to Previous Page
    • Page 1
    • Interim pages omitted …
    • Page 44
    • Page 45
    • Page 46
    • Page 47
    • Page 48
    • Interim pages omitted …
    • Page 96
    • Go to Next Page »

    Primary Sidebar

    Search

    Let’s Connect

    Meet Wendy & Jess

    Registered Dietitians & BFF's. We're probably busy eating right now.

    Subscribe to our Podcast

    food heaven podcast

    Podcast Hookup Codes

    food heaven podcast hookup codes

    Meet Wendy & Jess

    Registered Dietitians & BFF's. We're probably busy eating right now.

    • Diabetes Digital
    • Our Story
    • Recipes
    • Resources
    • Articles
    • Contact
    • Policies
    © Food Heaven Made Easy
    In order to provide you with the best service, our website uses cookies. By continuing to browse the site you are agreeing to our Privacy Policy I consent
    Privacy Policy

    Privacy Overview

    This website uses cookies to improve your experience while you navigate through the website. Out of these cookies, the cookies that are categorized as necessary are stored on your browser as they are essential for the working of basic functionalities of the website. We also use third-party cookies that help us analyze and understand how you use this website. These cookies will be stored in your browser only with your consent. You also have the option to opt-out of these cookies. But opting out of some of these cookies may have an effect on your browsing experience.
    Necessary
    Always Enabled
    Necessary cookies are absolutely essential for the website to function properly. This category only includes cookies that ensures basic functionalities and security features of the website. These cookies do not store any personal information.
    Non-necessary
    Any cookies that may not be particularly necessary for the website to function and is used specifically to collect user personal data via analytics, ads, other embedded contents are termed as non-necessary cookies. It is mandatory to procure user consent prior to running these cookies on your website.
    SAVE & ACCEPT