• Skip to main content
  • Skip to primary sidebar
Listen to the Latest Podcast EpisodeAnd We’re Back! Introducing: Diabetes Digital
Food Heaven Made Easy

Food Heaven Made Easy

Black Registered Dietitian Nutritionists | Intuitive Eating Dietitians

  • About
  • Press
    • Diabetes Digital
    • Start Here
    • Podcast
      • Hookup Codes
    • Work With Us
    • Resources
      • Recipes
      • Blog
      • Cookbook
      • Books We Love
    Looking for nutrition counseling with expert registered dietitians?
    Get Started

    Jessica

    5 Minute Pepperjack Breakfast Tacos

    August 10, 2015 by Jessica 5 Comments

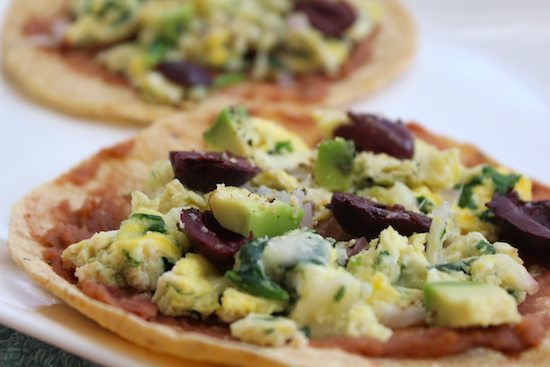
    You’re going to love our 5 minute Pepperjack Tacos! As a vegetarian, I’m constantly looking for ways to boost my protein intake after an intense weight training workout. These egg tacos were oh-so-tasty and only took 5 minutes in total to make. 

    As I said before, the beans and eggs are add a phenomenal amount of protein.  The eggs in this not only provide plenty of protein, but they also provide healthy fats, selenium, vitamin D, vitamin B6, vitamin B12, zinc, iron, and copper.  You can see why we love eggs so much!

    fat free pepper jack cheese

    Mix spinach, eggs, and onion in a bowl.  Now you have two options: you can cook the egg mixture on the stovetop or in the microwave.  Take your pick.  If you choose to use the stovetop, start by adding a teaspoon of oil and scramble at low heat.  Then melt the pepper jack on top of the mixture.  If you choose to use the microwave, cook on high for one minute and then stir and add a slice of pepper jack. 

    Continue cooking for another minute until the eggs are done and the cheese is melted.  Heat up the corn tortillas for about 3 minutes on a stovetop, steamer, or microwave. Spread the beans onto the tortillas, and then add the eggs.  Top with a few chunks of avocado and olives, sprinkle with garlic powder, salt, and pepper. Enjoy!

    Let us know what you think in the comments below!

    Print
    5 Minute Pepperjack Tacos
    Total Time
    5 mins
     
    Servings: 1
    Ingredients
    • 2 eggs
    • 2 corn tortillas
    • 1/4 cup of black beans, mashed
    • 1 slice of pepper jack cheese
    • 1/4 cup of chopped spinach
    • 1 tablespoon of chopped onion
    • 1/4 avocado, cubed
    • Garlic powder, salt and black pepper to taste
    • Optional: 8 pitted Kalamata olives
    Instructions
    1. Mix chopped spinach, eggs and onion in a bowl
    2. You can either cook egg mixture on stovetop or in microwave. For stovetop, add a teaspoon of oil and scramble at low heat, then melt pepperjack atop the egg mixture. If cooking in microwave, cook on high heat for 1 minute, then stir, add slice of pepperjack and continue cooking for another minute until done.
    3. Heat up the tortillas on a stovetop, microwave, or oven, and spread beans on top of tortillas, then add cooked eggs

    4. Top with a few chunks of avocado and olives
    5. Sprinkle garlic powder, salt and pepper to taste
    Recipe Notes

    Serves 2 if snack and 1 if meal.

    Filed Under: Breakfast, Main Courses

    DIY Basil Berry Popsicle Recipe

    July 29, 2015 by Jessica Leave a Comment

    Who is ready for summer to startup? These Basil Berry Popsicles will certainly get you in the mood.  Picture it: sitting poolside, cooling off with with a basil berry popsicle.  These are super easy to make and you’ll be able to enjoy them all weekend long.  Using fresh or frozen berries both work well.  If you have some sitting in the fridge that are about to go bad, toss them into this popsicle recipe to get the most you can out of your food! The basil and berry combo is super refreshing.

    pops-best-pic-copy-550

    You can use any berries that you like! I chose blueberries and strawberries for mine.  Berries are loaded with antioxidants.  Antioxidants help the body protect against diseases such as cancer.  They are also a great source of fiber.  You can use blueberries, strawberries, raspberries, blackberries, you name it!  Studies have found that a regular consumption of berries have been linked with improvements in HDL or “good” cholesterol, increased heart health, and lower blood pressure.  Making your own popsicles from natural, whole fruit calms your sweet tooth while providing many healthy benefits! Whip these up instead of buying prepackaged sweets.

    This recipe is super simple to make.  Just start by blending your berries, almond milk, vanilla, basil, and sweetener  Add the blended mixture to a popsicle mold and freeze overnight! Viola! Your popsicles are ready by the morning.  Play around with different berry mixtures.  What are your favorite berries? Let us know in the comments below! xo

    Print
    Basil Berry Pops
    5 mins
     
    Servings: 4
    Ingredients
    • 2 cups of berries, I used blueberries and strawberries
    • 1/2 cup of almond milk
    • 1/4 teaspoon of vanilla
    • 8 leaves of basil
    • Optional: 1/4 teaspoon of maple syrup
    Instructions
    1. Blend ingredients, add to popsicle mold, and freeze overnight

    Recipe Notes

    You will need a popsicle mold for this recipe

    Filed Under: Sweets Tagged With: basil berry, diy, popsicle recipe

    Grilled Sesame Tofu Sandwich

    July 21, 2015 by Jessica 1 Comment

    tofu sandwichTofu is made from curdled soy milk that the water has been removed from.  It tends to be fairly bland so it is great to marinate and flexible for whatever flavors you want to add. Tofu tends to have a meat like texture that many people like.  It is a great source of protein from that soy and provides a healthy dose of calcium and manganese. I know that many people struggle with properly cooking their tofu, but I think that I have perfected it in this recipe for you. Tossing your tofu on the grill helps add an extra crispiness, and requires little work.

    First, you’ll take your tofu and marinate it in a small bowl.  The marinade is a simple combo of sesame seed oil and soy sauce.  Let the tofu sit in the marinade for about 20 minutes to allow it to really soak in.  Throw the tofu on the grill for about 5 minutes or until crispy.  You can also cook it on the stove top if you don’t have a grill.  If you decide to go stove top, cook the tofu on each side for about 3 minutes.  Pop your bread in the toaster while the tofu cooks.  Finally, throw it all together with all of your favorite ingredients!

    Any toppings will really work for this sandwich.  I topped mine with avocado, lettuce, tomato, onion and mayo.  You can try anything you want.  How about hummus or spinach? What are your favorite sandwich toppings? Let us know how you prep this in the comments below! We love hearing from you. xo

    Print
    Grilled Sesame Tofu Sandwich
    Servings: 1
    Ingredients
    • 4 ounces of firm tofu
    • 2 teaspoons of sesame seed oil
    • 1 teaspoon of light soy sauce
    • 2 slices of toast
    Instructions
    1. In a small bowl, marinate tofu in sesame seed oil and soy sauce for at least 20 minutes.
    2. Throw it on a grill and cook for 5 minutes OR if using a stovetop, cook for 3 minutes on each side.
    3. Enjoy it on toast, and top your fave ingredients!

    4. For toppings, I used avocado, lettuce, tomato, onion, and mayonnaise. Enjoy!

    Filed Under: Main Courses Tagged With: blackened tofu, grilled tofu, sesame tofu, tofu, tofu sandwich, vegan sandwich

    Curry Coconut Chickpea Dish

    July 20, 2015 by Jessica 12 Comments

    This Curry Coconut Chickpea Dish will provide that bit of warmth you’re looking for.  I like to make this when I’m looking for that touch of comfort food. The potato and chickpea combo create such a comforting texture, while the curry in the dish is the perfect kick that you need with the sweet and creamy touch of coconut milk.  

    Chickpeas (also known as garbanzo beans) will add some plant-based protein to the dish.  There are 15 grams of protein in one cup of cooked chickpeas. They are also an excellent source of fiber, manganese, and folate!  You’ll love the taste and texture that they provide.  The kale helps to round out this recipe by providing vitamin K, A, and C, folate, B vitamins, copper, manganese, and even more fiber.  The coconut milk has a slightly sweet flavor with a creamy taste. Everything comes together for a delicious, satisfying meal! 

    Curry FoodIn a pot, heat up the coconut oil and add the curry powder. Allow it to cook for 1 minute, and then add chopped onions. Sauté for 2-3 minutes under medium heat. Add coconut milk, garlic and cayenne/habanero pepper. Cook for 5 minutes. Add salt to the curry sauce. Add chopped potato, water or vegetable broth, and all of the chickpeas. Put a lid on the pot, and allow to cook for 20-25 minutes, or until the potatoes are cooked.

    After potatoes are soft, add in kale, stir in, and cook for another couple of minutes. Adjust for salt, as needed, and enjoy with a side of rice!

    The coconut and curry give a savory and spicy combination that I think you will really love.  How did you like the curry/coconut mixture? Let us know what you think in the comment below! xo

    Print
    Curry Coconut Chickpeas
    Total Time
    40 mins
     
    Servings: 4
    Ingredients
    • 1 tablespoon of coconut oil
    • 1 tablespoon of curry powder
    • 1/2 red onion chopped
    • 1/2 cup of coconut milk
    • 2 cloves garlic minced
    • A pinch of cayenne pepper add a few pinches if you like spice or 1/2 habanero pepper, minced
    • 1/2 teaspoon salt
    • 1 medium potato chopped
    • 1 cup of water or vegetable broth
    • 1.5 cups of chickpeas cooked
    • 2 cups of raw kale finely chopped
    Instructions
    1. In a pot, heat up the coconut oil and add the curry powder. Allow it to cook for 1 minute, and then add chopped onions. Sauté for 2-3 minutes under medium heat.
    2. Add coconut milk, garlic and cayenne pepper. Cook for 5 minutes.
    3. Add salt to the curry sauce, to taste.
    4. Add chopped potato, water or vegetable broth, and all of the chickpeas. Put a lid on the pot, and allow to cook for 20-25 minutes, or until the potatoes are cooked.
    5. After potatoes are soft, add in kale, stir in, and cook for another couple of minutes. Adjust for salt, as needed and enjoy with a side of rice!

    Filed Under: Main Courses

    Greek Yogurt Creme Brulee

    July 14, 2015 by Jessica Leave a Comment

    Who loves their dessert? I know I sure do and let me tell you, this Greek Yogurt Creme Brulee does just the trick.   I am always looking for ways to make healthy alternatives to my favorite delicacies.  When I am looking for something decadent, this does it.  Wow your guests with this fancy dessert.  Impress them with your mad cooking skills while serving them something healthy at the same time!

    Greek yogurt helps add many nutrients and improve a typical creme brulee.  It offers a high protein option with healthy probiotics that will promote gut health. Gut health is important for normal digestion and for keeping a healthy immune system.  The cherries do a world of good for the flavor in these.  They offer a savory sweetness that is hard to beat.  Cherries are also great for antioxidants, specifically anthocyanins.  Anthocyanins are what give cherries their gorgeous color.  They have been found to protect against heart disease, lower the risk of cancer, and provide anti-inflammatory benefits.  Cherries have significantly reduced the risk of cancer in various studies.  With Greek yogurt and cherries, you’ve turned your dessert into a healthy snack!

    crem web
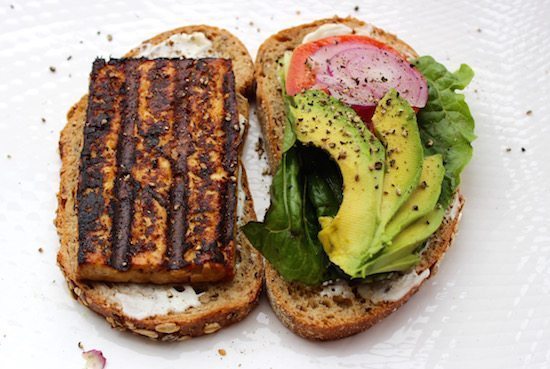
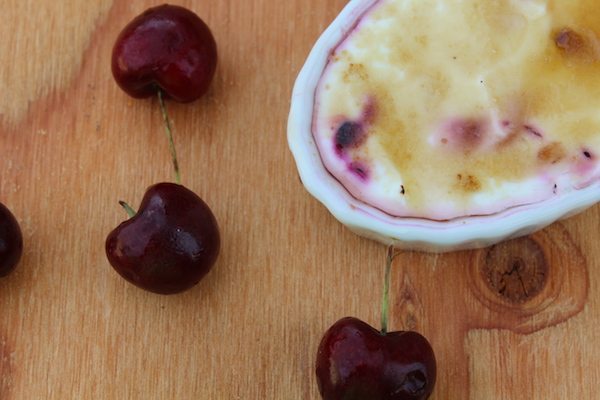
Take a couple cups of vanilla Greek yogurt and mix with some pitted and sliced cherries.  Divide this mixture into four mini, flame-proof bowls and cover with a layer of brown sugar.  Use a brûlée torch or the broiler for the over for 2-3 minutes until the sugar caramelizes into a perfectly golden crust.

    The Greek yogurt offers a perfect swap for the typical custard base of a creme brûlée.  I love treating myself to a dish like this after a long day and a good meal.  It really is sweet and creamy enough to hit the spot. The best part about this is that you have created an elegant, noteworthy dessert in the comforts of your home.  You do not even have to have a brûlée torch to make these! How do you like the Greek yogurt swap?  Let us know in the comments below! xo

    Print
    Greek Yogurt Creme Brulee
    Total Time
    10 mins
     
    Servings: 4
    Ingredients
    • 2 cups of vanilla greek yogurt
    • 10 cherries, de-seeded and sliced
    • 1-2 tablespoons of brown sugar, granulated sugar works fine too
    • Creme brûlée torch
    Instructions
    1. Mix cherries and yogurt
    2. Divide mix into 4 mini flame-proof bowls
    3. Cover with a layer of brown sugar
    4. Use a Brulee torch or the broiler in your oven for 2-3 minutes until the sugar caramelizes into a perfectly golden crust. Enjoy!

    Filed Under: Sweets Tagged With: black cherry, creme brulee, greek yogurt

    Homemade Cashew Milk

    June 17, 2015 by Jessica 6 Comments

    Cashew milk can be a great addition to many of your regular recipes.  Throw it in with some homemade granola for a bowl of cereal or toss it in as the liquid base to a nutritious smoothie when you are on the go.

    IMG_0367

    IMG_0345
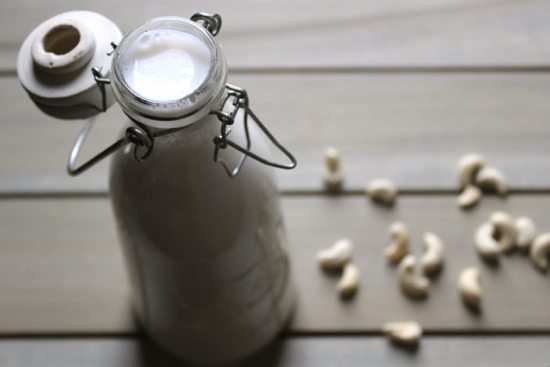
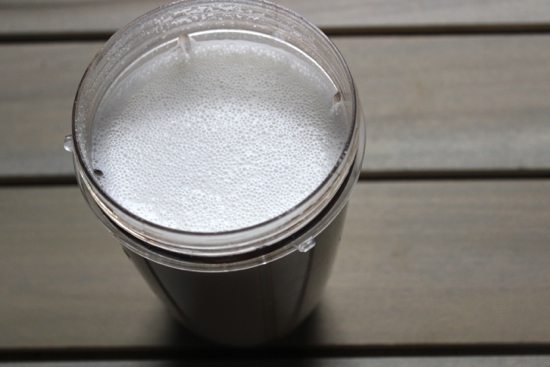
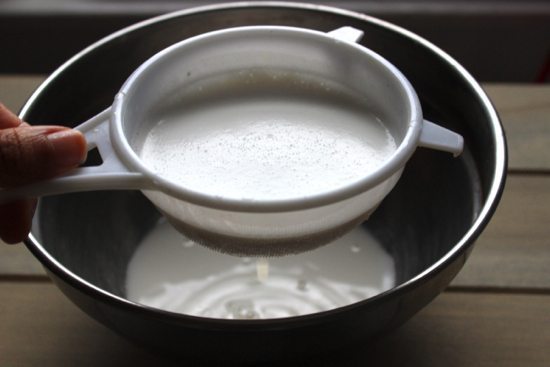
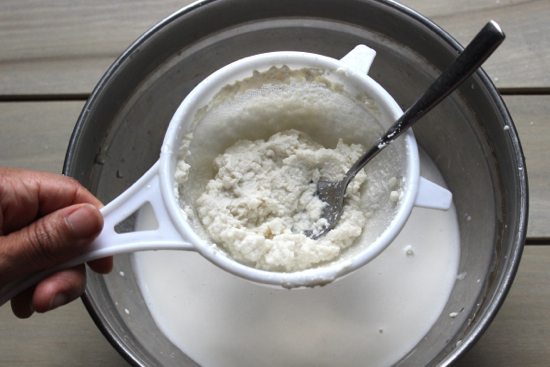
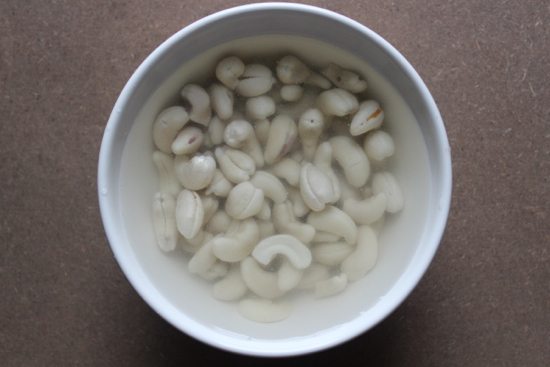
All you need to make the milk is a cup of unsalted cashews and seven cups of water.  Soak your cashews in about four cups of water for at least 3-4 hours.  After a few hours, dispose of the water the cashews were soaking in.  Toss the cashews into a blender and blend them up with another three cups of water.  Position a bowl under a cheesecloth or mesh strainer to catch the milk and pour the milk into the strainer.  If you’re looking to sweeten up your milk, throw in a bit of vanilla extract for extra flavor that will go perfectly with that bowl of crunchy granola.

    IMG_0346
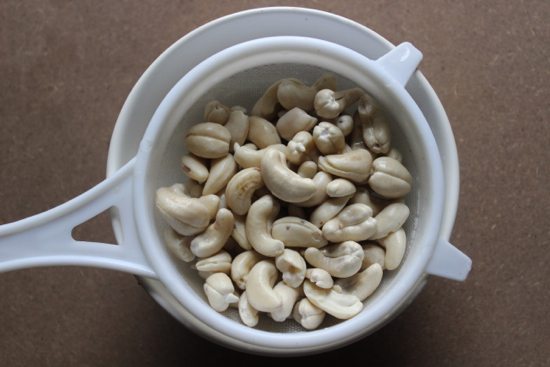
You can make this ahead of time and store in the refrigerator for up to 7 days.  Enjoy throughout the week in many different recipes.  How do you like the sound of making your own cashew milk? Let us know what you think in the comments below!

    Print
    Homemade Cashew Milk
    Ingredients
    • 1 cup of raw unsalted cashews
    • 7 cups of water
    Instructions
    1. Soak cashews for 3-4 hours in 4 cups of water
    2. Dispose of the water, and in a blender, blend cashews with 3 cups of fresh water
    3. Position a bowl to collect the milk. Pour the liquid through a cheese cloth or a mesh strainer into the bowl
    4. Optional: flavor with vanilla extract
    Recipe Notes

    Store in the refrigerator up to 7 days

    IMG_0347

    IMG_0351
    IMG_0356

    Filed Under: Drinks Tagged With: almond milk, cashew milk, dairy alternative, Homemade Cashew Milk, nut milk

    • « Go to Previous Page
    • Page 1
    • Interim pages omitted …
    • Page 19
    • Page 20
    • Page 21
    • Page 22
    • Page 23
    • Interim pages omitted …
    • Page 36
    • Go to Next Page »

    Primary Sidebar

    Search

    Let’s Connect

    Meet Wendy & Jess

    Registered Dietitians & BFF's. We're probably busy eating right now.

    Subscribe to our Podcast

    food heaven podcast

    Podcast Hookup Codes

    food heaven podcast hookup codes

    Meet Wendy & Jess

    Registered Dietitians & BFF's. We're probably busy eating right now.

    • Diabetes Digital
    • Our Story
    • Recipes
    • Resources
    • Articles
    • Contact
    • Policies
    © Food Heaven Made Easy
    In order to provide you with the best service, our website uses cookies. By continuing to browse the site you are agreeing to our Privacy Policy I consent
    Privacy Policy

    Privacy Overview

    This website uses cookies to improve your experience while you navigate through the website. Out of these cookies, the cookies that are categorized as necessary are stored on your browser as they are essential for the working of basic functionalities of the website. We also use third-party cookies that help us analyze and understand how you use this website. These cookies will be stored in your browser only with your consent. You also have the option to opt-out of these cookies. But opting out of some of these cookies may have an effect on your browsing experience.
    Necessary
    Always Enabled
    Necessary cookies are absolutely essential for the website to function properly. This category only includes cookies that ensures basic functionalities and security features of the website. These cookies do not store any personal information.
    Non-necessary
    Any cookies that may not be particularly necessary for the website to function and is used specifically to collect user personal data via analytics, ads, other embedded contents are termed as non-necessary cookies. It is mandatory to procure user consent prior to running these cookies on your website.
    SAVE & ACCEPT