• Skip to main content
  • Skip to primary sidebar
Listen to the Latest Podcast EpisodeAnd We’re Back! Introducing: Diabetes Digital
Food Heaven Made Easy

Food Heaven Made Easy

Black Registered Dietitian Nutritionists | Intuitive Eating Dietitians

  • About
  • Press
    • Diabetes Digital
    • Start Here
    • Podcast
      • Hookup Codes
    • Work With Us
    • Resources
      • Recipes
      • Blog
      • Cookbook
      • Books We Love
    Looking for nutrition counseling with expert registered dietitians?
    Get Started

    Wendy

    Roasted Cauliflower Tacos

    April 21, 2016 by Wendy 3 Comments

    These roasted cauliflower tacos provide a burst of flavor that will have you wanting to prepare another batch as soon as these disappear. Don’t get overwhelmed by the semi-long ingredient list! This recipe is relatively simple and painless to prepare. Depending on how much you eat, this recipe is good for 1-2 people. I had a huge appetite and was hangry (hunger-induced anger), so I enjoyed these all by myself.

    Let’s get into how you’ll be whipping these beauties up! First you’ll be preparing a spice mix with spices listed below, lime juice, and oil. You’ll be drizzling this yummy mix over your cauliflower florets, and then baking on 400F for 30 minutes. While this is happening, you’ll prepare a crunchy red cabbage slaw to top the tacos. The slaw is made with red cabbage, carrots, jalapeño, mustard, and apple cider vinegar (adds a huge kick in flavor!) Once the cauliflower is crisp and brown, you’ll be adding them to your warm tortillas and topping with the red cabbage slaw. We’re going to finish these off with fresh cilantro, avocado, and salt to taste.

    These tacos are a great option for when you’re spending the day in and want a simple, yet satisfying meal. Although all of the ingredients in this recipe are superheroes, today we’ll give a big shout out to our girl red cabbage. Besides adding crunch to this recipe, red cabbage is incredibly rich in Vitamin C & K. The deep red colors are an excellent source of anthocyanins; plant pigments that have anti-carcinogenic and anti-inflammatory properties. You can add red cabbage to salads, meals, or soups.

    Now let’s hear from you! Did you give these a try? Let us know in the comments below! Sending you all love and hugs

    Print
    Roasted Cauliflower Tacos
    Servings: 1
    Ingredients
    For the cauliflower:
    • 2 cups cauliflower florets, cut into 1" pieces
    • 2 teaspoons red chili powder
    • 1 teaspoon cumin
    • 1 teaspoon garlic powder
    • Dash of cayenne pepper
    • Juice of ½ lime
    • 2 tablespoons vegetable oil
    For the toppings:
    • ¼ cup red cabbage, grated
    • 1 small carrot, grated
    • 1 teaspoon Dijon mustard
    • 1 teaspoon apple cider vinegar
    • ½ jalapeño, de-seeded and sliced in rounds
    • 4 corn tortillas
    • ½ avocado
    • 2 tablespoons fresh cilantro
    • Salt, to taste
    Instructions
    For the cauliflower:
    1. Preheat your oven to 400F.
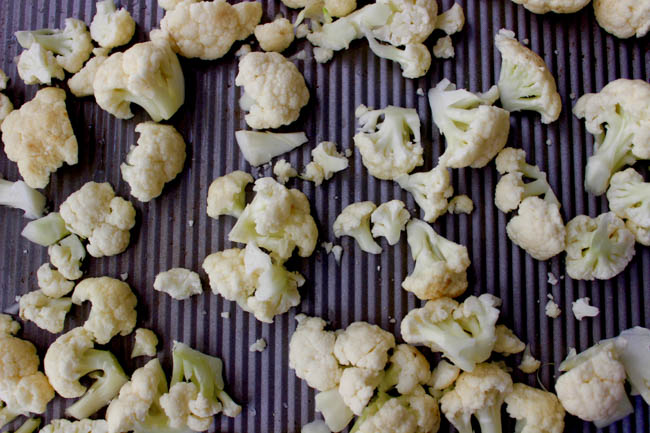
    2. Place your cauliflower florets on a baking sheet lined with parchment paper.
    3. In a small bowl, mix chili powder, cumin, garlic powder, and cayenne pepper with lime juice and oil.

    4. Drizzle the spice mix onto the cauliflower evenly and bake at 400F for 30 minutes
    For the toppings:
    1. While the cauliflower is baking, prepare your red cabbage slaw by simply tossing your grated carrot and red cabbage in a bowl with Dijon mustard, apple cider vinegar, and sliced jalapeño pepper rounds. Set aside.
    2. Heat 4 tortillas in a steamer, microwave, or stovetop for 2-3 minutes until tender
    3. Once the cauliflower is ready, remove from the oven and we’ll get to stuffing!
    4. Layer the roasted cauliflower onto the tortillas, and then add the red cabbage slaw
    5. Finish by topping with fresh cilantro, sliced avocado, and salt to taste. Enjoy!


    Filed Under: Main Courses

    No-Churn Blackberry Coconut Ice Cream

    April 19, 2016 by Wendy 5 Comments


    This week we whipped up this creamy no-churn blackberry coconut ice cream. After months of rain, fog, and snow, I got way too excited when it hit sunny 70’s in NYC. This ice cream symbolizes my excitement about this beautiful warmth and sun that hit us this week. It came out so good that I can’t wait to create more varieties for you all, especially with summer right around the corner. I don’t have an ice-cream maker and so this was made in my NutriBullet in 3 easy steps.

    First you want to chill the full-fat coconut milk for at least 2 hours in the refrigerator. Overnight is even better. Next you’ll blend your frozen fruit with the chilled coconut milk. All of the fruit I used was fresh, and so I froze them overnight and then dropped them into the blender. If going this route, make sure you are freezing ripened fruit (no green bananas please!) The sugars naturally produced from the ripening process provide all the sweetness you’ll need for this recipe. You can also just buy the frozen fruit and skip everything I just told you.

    After the ingredients have been blended, you’ll be pouring them into a freezer container. Leave the ice cream in the freezer for 2-3 hours, or until the ice cream has hardened, but can still be easily scooped. This ice cream is best when enjoyed fresh, but if you want to go ahead and store it, that’s an option too. It’s good for up to 1 week in the freezer. Just make sure that when you’re ready to enjoy, you leave it out for 20 minutes so it can soften up for scooping. 

    Now for the toppings! I had these with chia seeds and fresh blackberries. I love the chia seeds because they add a crunch to the ice cream, and it almost feels like I am having sprinkles (really healthy sprinkles). Other options are nuts, cacao nibs, or any fresh fruit you love. Hope you give this beauty a try! And as always, make sure you let us know in the comments below how this recipe comes out for you! xo

    Print
    No Churn Blackberry Coconut Ice Cream
    Servings: 3
    Ingredients
    • 1 cup full-fat coconut milk
    • 2 cups frozen blackberries
    • 1 frozen banana
    Instructions
    1. Chill the coconut milk for at least 2 hours in the refrigerator
    2. In a blender or food processor, blend coconut milk, frozen blackberries, and the 1 frozen banana
    3. Pour into a freezer container, and place in the freezer for 2-3 hours, or until the ice cream has hardened, but can still be easily scooped
    4. Scoop the ice cream into a bowl and enjoy!
    5. Although this is best when fresh, you can definitely store it as well. When you’re ready to enjoy, just leave it out for 20 minutes until it softens up a bit, and then scoop into your bowl
    6. You can leave in the freezer for up to 1 week

    Filed Under: Sweets

    Caramelized Onion Goat Cheese Pita Pizza

    April 12, 2016 by Wendy 4 Comments

    This caramelized onion & goat cheese pita pizza is happening right now! Pita pizzas are my go-to dinner option when I get home tired, hungry, and ready to eat. It’s quick, hearty, and involves very little prep. What I usually do is buy a pack of pita bread and freeze most of the rounds so I have dinner backups stocked. Just thaw one round in the morning and by the time you get home, it will be ready for use. For this recipe, you’ll be topping the pizza with caramelized onions and mushrooms, which can be prepared in less than 5 minutes.

    After that, all you’ll be doing is crumbling the goat cheese on top and popping in the oven for 10 minutes or until the bread crust is crisp. The fresh basil and balsamic vinegar add the perfect finishing touch of sweetness to the recipe. Cut it up and enjoy with your favorite salad! Let us know in the comments below what your favorite toppings are for pita pizzas! Also let us know if you give this bad gal a try. xoxo


    Print
    Caramelized Onion & Goat Cheese Pita Pizza
    Total Time
    15 mins
     
    Servings: 1
    Ingredients
    • 1 pita bread
    • ½ cup tomato sauce
    • 1 tablespoon olive oil
    • ¼ teaspoon brown sugar
    • ¼ medium onion, thinly sliced
    • ½ cup button mushrooms
    • 1 tablespoon goat cheese
    • ½ teaspoon balsamic vinegar
    • Fresh basil, to taste
    Instructions
    1. Preheat the oven to 400F.
    2. Place the pita bread on a baking sheet lined with parchment paper.
    3. Coat the pita bread with tomato sauce, and set aside
    4. In a pan, heat olive oil and cook the sugar under medium heat for 1-2 minutes or until the sugar starts bubbling
    5. Add the onion rounds and mushrooms to the pan, and cook for 3-4 minutes or until golden brown
    6. Remove and top the pita bread with the mushroom onion sauté
    7. Crumble the goat cheese on the pita, and pop in the oven at 400F for 10 minutes
    8. Remove and top with drizzled balsamic vinegar and fresh basil leaves

    Filed Under: Main Courses

    Spiced Popcorn 3 Ways

    April 7, 2016 by Wendy 6 Comments

    These spiced popcorn mixes are going to give you so much life! I’ve been taking them to work every day this week and enjoying them as a mid-day snack. Everyone has their own tricks to making popcorn (share yours in the comments below!) I’ve had my fair share of burned batches, and I can’t even keep track of how many times the smoke detector has gone off. As a result, I’ve developed a method that works.

    All you have to do is add oil to the pot, put 1 kernel inside, and place the cover on, over medium heat. When that one kernel pops, it’s time to add the rest of the kernels in- just enough to cover the entire bottom of the pot.

    Place the lid on, and let heat work it’s magic. Within minutes, you will have a pot filled with warm and fresh popcorn! You can top the popcorn with the spice mixes below. Each of these mixes is enough for 4 cups of popped corn.

    (Note: if you want to make oil free popcorn, we love this air-popper from Amazon.)

    Print
    Spiced Popcorn 3 Ways
    Servings: 1
    Ingredients
    • 1/2 cup of popcorn kernels
    • 2 tablespoons of vegetable or coconut oil
    CURRY-PAPRIKA MIX
    • 1/2 teaspoon curry powder
    • 1/2 teaspoon paprika
    • Sea salt to taste
    GARLIC-PARM MIX
    • 1/2 teaspoon garlic powder
    • 1/2 teaspoon grated parmesan
    SPICY OREGANO MIX
    • 1/2 teaspoon oregano
    • 1/2 teaspoon crushed black pepper
    • Sea salt to taste
    Instructions
    1. Add oil to the pot, put 1 kernel inside, and place the cover on over medium heat.
    2. When that one kernel pops, it’s time to add the rest of the kernels in- just enough to cover the entire bottom of the pot.
    3. Place the lid on, and let heat work it’s magic. Within minutes, you will have a pot filled with warm and fresh popcorn! You can top the popcorn with one of the spice mixes mentioned above.
    4. Each of these mixes is enough for 4 cups of popped corn.

    Filed Under: Appetizers, Salads, Sides

    Black Pepper Tofu

    March 20, 2016 by Wendy 3 Comments

    This Black Pepper Tofu hits the spot in so many ways! It has a fiery pepper flavor that will add a dose of pop to your favorite dishes. Simply marinate the tofu for an hour, and cook on the stove until you get a deep brown color. Once these tofu chunks were done, I tossed them into spinach quesadillas and it made the meal so much more complete!

    Tofu is made from curdled soy milk that the water has been removed from.  It can be fairly bland so it is great to marinate and flexible for whatever flavors you want to add. Tofu tends to have a meat like texture that many people like.  It is a great source of protein from that soy and provides a healthy dose of calcium and manganese.  Many people struggle to get the right texture to their tofu, but this recipe will crisp it up nicely.  

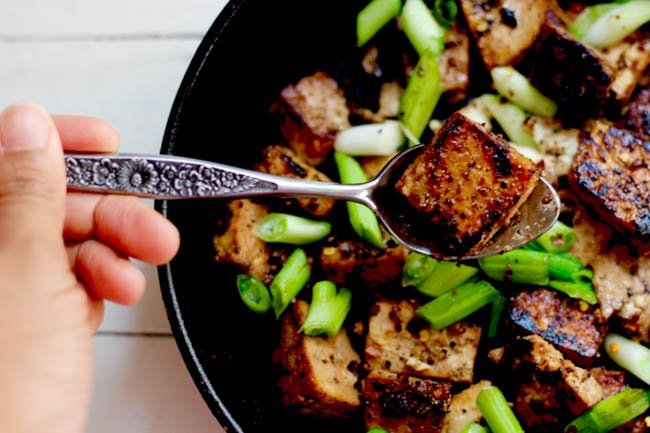
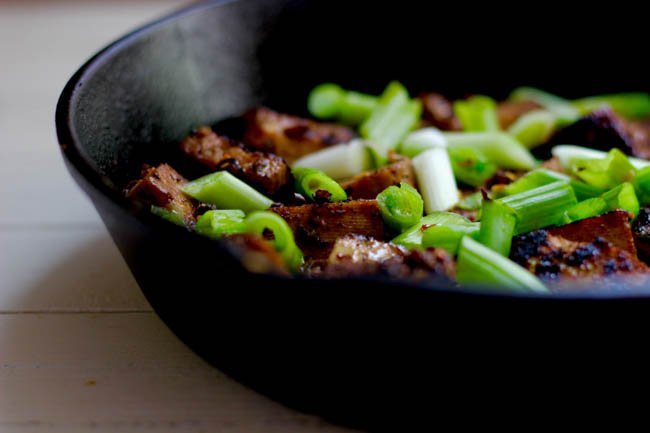
    Start by cutting half of a block of firm tofu into 1×1 inch squares and place into a bowl.  Add some soy sauce, maple syrup, sesame seed oil, ginger, crushed black pepper, and garlic powder to the bowl and mix in well together, making sure the tofu is all coated nicely with the marinade.  Let the tofu marinate for at least an hour.  After an hour, heat a pan over medium heat and cook the tofu for about 3-4 minutes on each side or until golden brown.  Top with a pinch of cayenne pepper and/or red pepper flakes.

    You can also enjoy this tofu with your favorite grain, or toss into a green salad. Throw on some fresh scallions or add to your favorite quesadillas for a nice touch of protein. Any tofu lovers out there? Drop a line in the comments below! Hope you give this recipe a try- if you do, let us know how it comes out!

    Print
    Black Pepper Tofu
    Total Time
    1 hr 10 mins
     
    Servings: 2
    Ingredients
    • 1/2 block of firm tofu, pressed
    • 1/2 cup of scallions, chopped
    • 2 tablespoons soy sauce
    • 1 tablespoon of maple syrup
    • 1 tablespoon crushed black pepper
    • 1 tablespoon sesame seed oil
    • 1 teaspoon fresh ginger, minced
    • 1/2 teaspoon garlic powder
    • Pinch of cayenne pepper
    • Optional: red pepper flakes
    Instructions
    1. Cut tofu into 1x1 inch squares and place into a bowl
    2. Add soy sauce, maple syrup, sesame seed oil, ginger, crushed pepper, and garlic powder to the bowl, and mix in well together
    3. Let marinate for at least 1 hour
    4. Heat a pan, and under medium heat, cook tofu for 3-4 minutes on each side or until golden brown
    5. Top with a pinch of cayenne pepper and (optional) red pepper flakes
    Recipe Notes

    Top with fresh scallions, and enjoy with a side of rice or quinoa. You can also toss these in a salad or use them as a stuffing for quesadillas!


    Filed Under: Main Courses

    DuraLex Bowl Set

    March 20, 2016 by Wendy Leave a Comment

    Filed Under: Our Kitchen Favs

    • « Go to Previous Page
    • Page 1
    • Interim pages omitted …
    • Page 84
    • Page 85
    • Page 86
    • Page 87
    • Page 88
    • Interim pages omitted …
    • Page 96
    • Go to Next Page »

    Primary Sidebar

    Search

    Let’s Connect

    Meet Wendy & Jess

    Registered Dietitians & BFF's. We're probably busy eating right now.

    Subscribe to our Podcast

    food heaven podcast

    Podcast Hookup Codes

    food heaven podcast hookup codes

    Meet Wendy & Jess

    Registered Dietitians & BFF's. We're probably busy eating right now.

    • Diabetes Digital
    • Our Story
    • Recipes
    • Resources
    • Articles
    • Contact
    • Policies
    © Food Heaven Made Easy
    In order to provide you with the best service, our website uses cookies. By continuing to browse the site you are agreeing to our Privacy Policy I consent
    Privacy Policy

    Privacy Overview

    This website uses cookies to improve your experience while you navigate through the website. Out of these cookies, the cookies that are categorized as necessary are stored on your browser as they are essential for the working of basic functionalities of the website. We also use third-party cookies that help us analyze and understand how you use this website. These cookies will be stored in your browser only with your consent. You also have the option to opt-out of these cookies. But opting out of some of these cookies may have an effect on your browsing experience.
    Necessary
    Always Enabled
    Necessary cookies are absolutely essential for the website to function properly. This category only includes cookies that ensures basic functionalities and security features of the website. These cookies do not store any personal information.
    Non-necessary
    Any cookies that may not be particularly necessary for the website to function and is used specifically to collect user personal data via analytics, ads, other embedded contents are termed as non-necessary cookies. It is mandatory to procure user consent prior to running these cookies on your website.
    SAVE & ACCEPT