I don’t know about you but I cannot get enough Reese’s in my life. Here’s a spinoff.
 Dark chocolate is a good source of iron, magnesium, copper, and manganese to help you get a healthy dose of minerals.
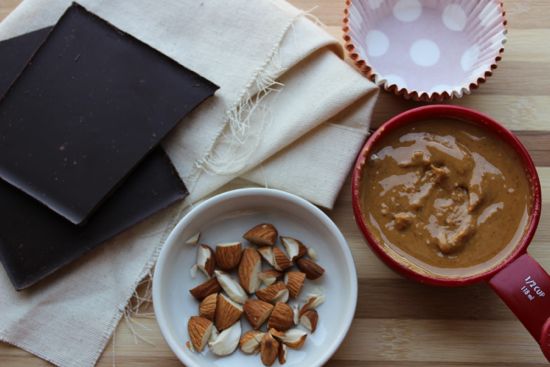
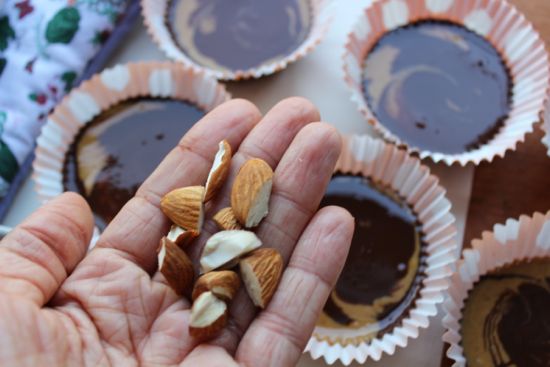
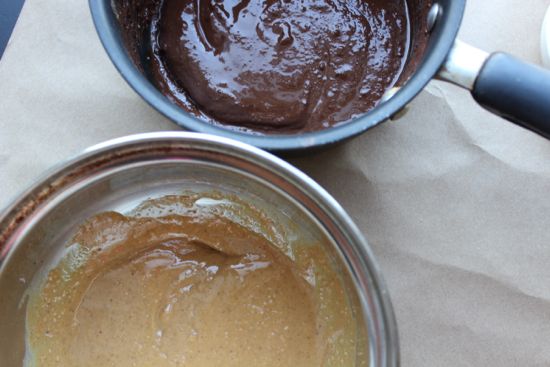 We’re going to grab all of our ingredients and get this one started. Begin by melting one bar of dark chocolate in the microwave for about 30 seconds. Break the chocolate pieces up and add to a saucepan. Chocolate burns pretty quickly, so make sure you’re keeping a close eye on it! Stir the chocolate until it is completely melted and pour into a bowl. You’re going to do the same for the almond butter until it is completely melted too. Once the chocolate and almond butter are all ready to go, pour one small layer of chocolate into a cupcake holder, then pour a layer of almond butter, sprinkle in some almonds, and then top it off with another layer of chocolate. Let the cups chill in the refrigerator for 2-3 hours.
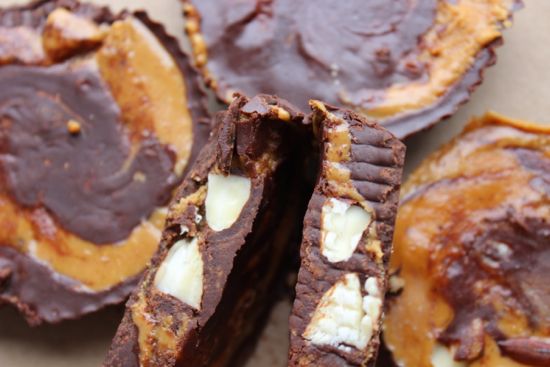 How quick and easy was that? You can switch this recipe up with a variety of different nut butters and play with the ingredients to make this recipe unique! Throw one in with your lunch for that healthy and delicious afternoon pick-me-up. How do you like our spin on the classic PB and chocolate combo? Let us know what you think in the comments below!

- 1, 100- gram bar of dark chocolate
- 1/2 cup of almond butter (or any nut butter)
- 4 chopped almonds
-
Melt chocolate in the microwave for about 30 seconds
-
If you are using a stove, heat saucepan on low heat OR see cool video tutorial above
-
Break chocolate into small pieces and add to pan
-
Pay close attention as the chocolate can burn quickly
-
Stir chocolate until it is completely melted, then quickly pour into a bowl
-
Repeat this same process with almond butter until it is fully melted
-
Lay out 6 cupcake holders on a plate
-
Pour one small layer of dark chocolate in each cup
-
Then pour a layer of almond butter in the cups
-
Sprinkle the crumbled almonds evenly on top of the almond butter layer
-
Top with a layer of chocolate
-
Place the cups in the fridge and chill for 2-3 hours. Enjoy!
You will need 6 cupcake holders for this recipe
 Though watermelon is mostly comprised of water, it still has many valuable nutrients to keep you healthy. Watermelon has a phytonutrient called lycopene that gives it the gorgeous color. Lycopene works as an antioxidant to protect against free radical damage. It has also been linked to lower risk for cancer, heart disease, and eye health. Watermelon is also a great source of vitamin C.
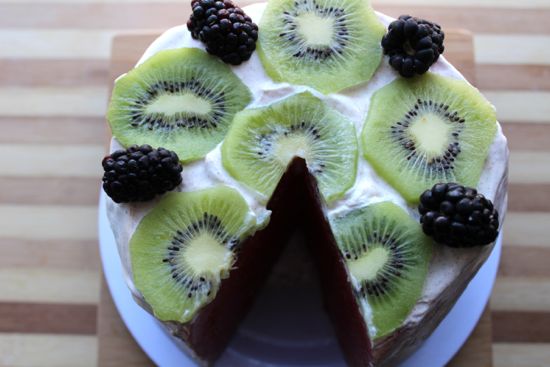
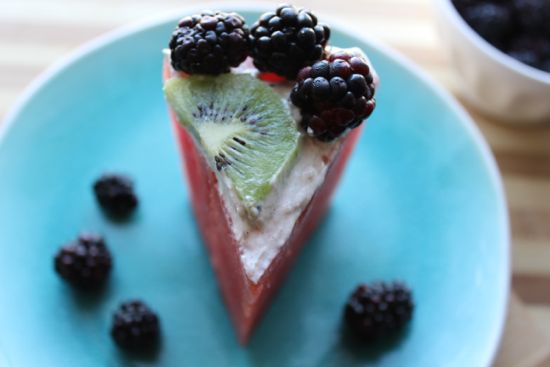
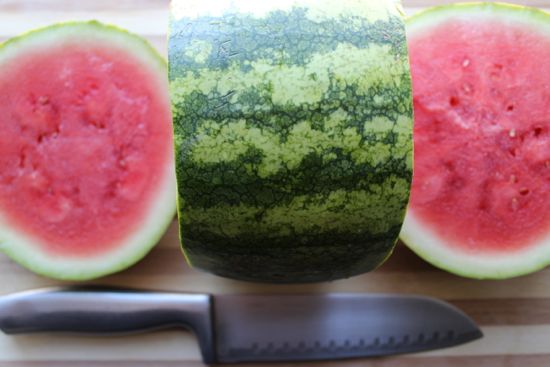
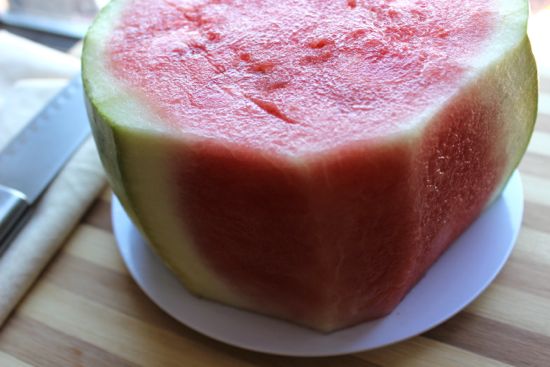
 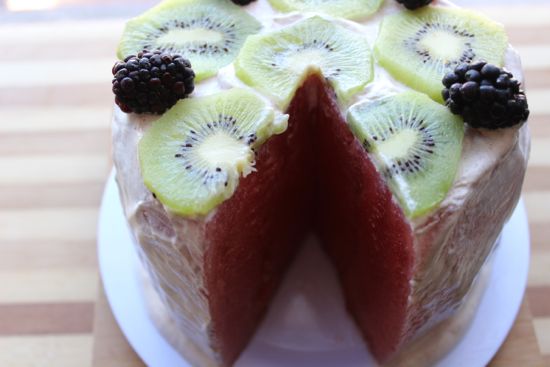 I’ll add in that this recipe is super simple and fun to make! Begin by mixing the cinnamon with the greek yogurt and placing that in the freezer for about 15-20 minutes. This will create a nice consistency to spread the yogurt on the watermelon. Prep the watermelon by cutting off both ends of it. Lay it on one of the ends and cut off the rind by cutting from top to bottom. Work around the whole watermelon until you just have the bright pink flesh. Grab the yogurt from the freezer and start to spread the mix onto the watermelon. Now you can decorate with fruit! We used kiwi and blueberries, but you can use whatever you want!
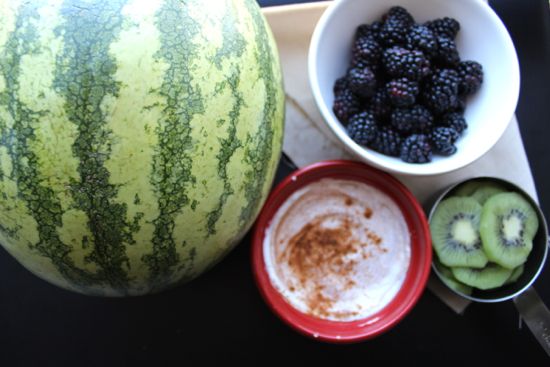
 Pro tip: This is best eaten right away, but if you are planning on serving it later, place it in the freezer for up to an hour. We think this is a perfect sweet treat to a hot summer day. How do you like the idea of a watermelon cake? Let us know what you think in the comments below!
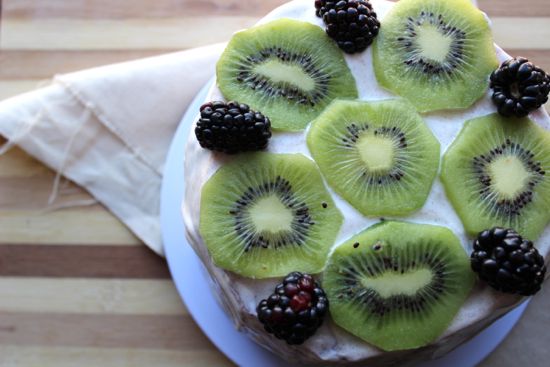


 As you may have noticed, we love beans! They are loaded with protein and fiber to give you a healthy dose of nutrients from just one of these tiny little guys. Protein and fiber help to promote satiety, aka: keep you full for hours so you’re not pigging out later on. This is also loaded with healthy veggies to give you a full meal packed with vitamins and minerals from those plants.
 In a bowl, you’re going to prep the salsa. Chop tomatoes, red onion, cilantro, and orange slices and combine all of the ingredients in a separate bowl. Feel free to shake this up a bit to let all of the ingredients really marinate together to get the most flavor. Next, heat your olive oil and saute onions, peppers, and garlic for about 3-4 minutes. Add your chili powder and cook for another few minutes. Remove from the pan and set aside. In the same pan, add one tablespoon of water, beans, and cumin. Cook this up for about five minutes or until the beans are fragrant. Combine everything in a bowl with lettuce. Top it off with some salsa and enjoy!