• Skip to main content
  • Skip to primary sidebar
Listen to the Latest Podcast EpisodeAnd We’re Back! Introducing: Diabetes Digital
Food Heaven Made Easy

Food Heaven Made Easy

Black Registered Dietitian Nutritionists | Intuitive Eating Dietitians

  • About
  • Press
    • Diabetes Digital
    • Start Here
    • Podcast
      • Hookup Codes
    • Work With Us
    • Resources
      • Recipes
      • Blog
      • Cookbook
      • Books We Love
    Looking for nutrition counseling with expert registered dietitians?
    Get Started

    Jessica

    The 28 Day Plant-Powered Cookbook

    September 4, 2016 by Jessica 25 Comments


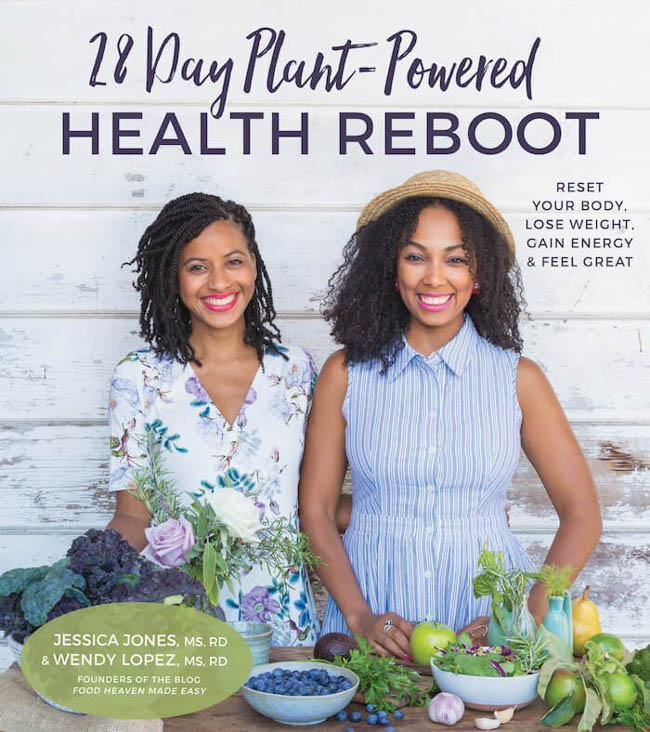
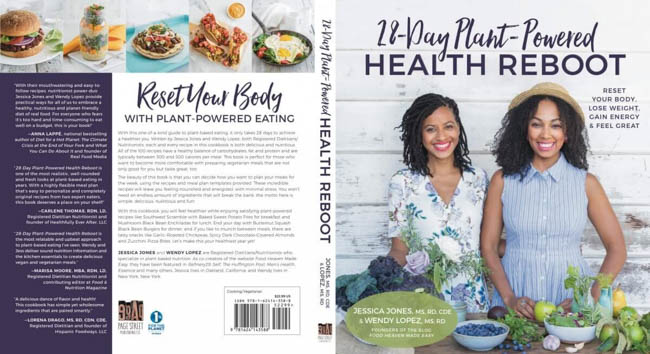
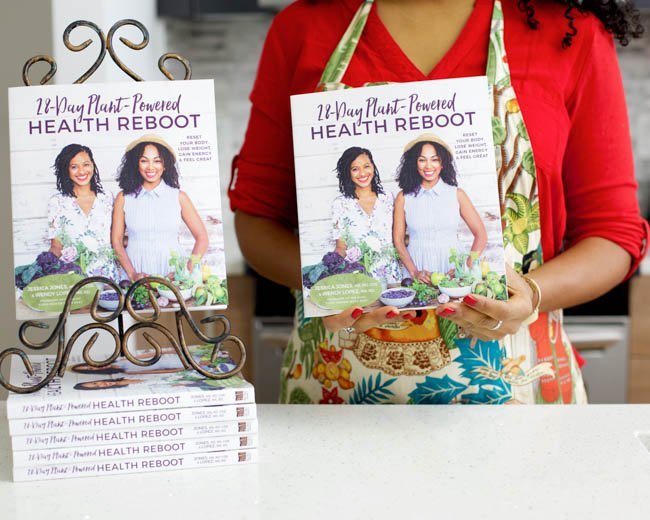
    We’re officially, honestly, truly, and absolutely releasing our very own cookbook!! This is our dream come true since we started our blog 5 years ago. The book includes 100 original, simple and delicious recipes that you’ll love. These recipes are brand new, meaning they have never been seen on the Food Heaven website before.

    More than just a regular cookbook, the 28-Day Plant-Powered Health Reboot was created to help you upgrade your health, gain energy, and feel great.

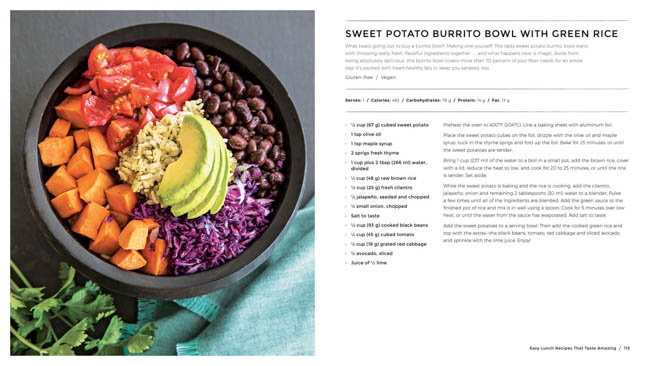
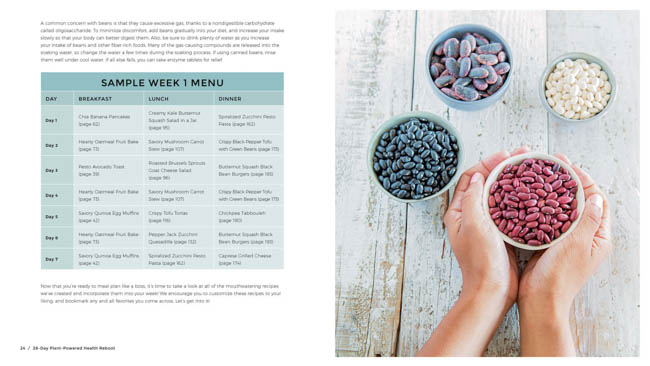
    Since it’s written by two Registered Dietitians, you can rest assured that all the recipes in this book are as healthy as they are delicious. The-28 Day Reboot also includes completely customizable meal plan templates with 4 weeks worth of easy breakfast, lunch and dinner recipes to choose from.

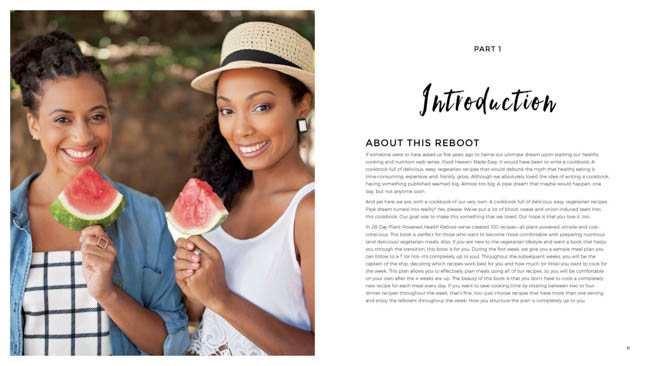
    With the 28-Day Plant Powered Health Reboot, you’ll discover the power of plant-based eating to reset your body’s internal systems. You’ll feel better and reap the health benefits of this healthy diet while learning which nutrients are best, how to meal plan and how to get healthy.

    BUY THE BOOK
    First, if you haven’t already, please take a second to cop the cookbook! We want to take this baby to the top of the bestsellers list, and we can only do it with the help of YOU.

    Amazon
    Barnes & Noble
    Target
    Books-A-Million
    Google Play
    Indiebound
    Book Depository
    Indigo

    LEAVE A REVIEW
    Second, if you already bought the book (thanks a trillion, for reals), please do your girls a solid and leave a cute little review on Amazon, Target, B&N, the Cookbook page (below) or any of the sellers mentioned above. It helps get the book in more hands, which supports our efforts here at Food Heaven Made Easy.


    ppek


    review

    “With their mouthwatering and easy-to-follow recipes, nutritionist power-duo Jessica Jones and Wendy Lopez provide practical ways for all of us—not just the 1 percent—to embrace a healthy, nutritious and planet-friendly diet of real food. For everyone who fears it’s too hard and time-consuming to eat well on a budget, this is your book!”

    • Anna Lappé, national bestselling author Diet for a Hot Planet: The Climate Crisis at the End of Your Fork and What You Can Do About It and founder of Real Food Media

    “Jessica and Wendy’s 28-Day Vegetarian Reset is one of the most realistic, well rounded and fresh looks at plant-based eating in years. With a highly flexible meal plan that’s easy to personalize and completely original recipes like roasted sweet potato breakfast bowl and vegan clam chowder from two expert eaters, this book deserves a place on your shelf!”

    • Carlene Thomas, RDN, LD, Registered Dietitian Nutritionist and founder of Healthfully Ever After LLC

    “The 28-Day Vegetarian Reset is the most relatable and upbeat approach to plant-based eating I’ve seen. Wendy and Jess deliver sound nutrition information and the kitchen essentials to create delicious vegan and vegetarian meals that are creative yet easy to make. I’m excited to share this resource with my clients!”

    • Marisa Moore, MBA, RDN, LD, Registered Dietitian Nutritionist and Contributing Editor, Food & Nutrition Magazine

    “A delicious mouthwatering dance of flavor and health! The cookbook has simple yet wholesome ingredients that are paired smartly. It offers you comfort foods that are delicious and tasteful. The healthy part comes as a bonus!”

    • Lorena Drago, MS, RD, CDN, CDE, Registered Dietitian and Founder, Hispanic Foodways, LLC


    Filed Under: Cookbook

    Chickpea Gazpacho

    July 24, 2016 by Jessica 7 Comments

     
    Who said you couldn’t enjoy soup in the summer? This creamy Chickpea Gazpacho is a perfect light and refreshing summer appetizer. It’s also easy to make, as there there is no cooking involved, as far as the actual Gazpacho is concerned. 
     
    We love this dish because it’s a deliciously simple way to get in 2 servings of veggies without even noticing. It also provides a healthy dose of fats — in the form of olive oil and avocados. And since this dish is 100% plant-based, there’s a dose of fiber in every single bite. There really isn’t a soup more perfect than this.


    Since 2016 is the International Year of the Pulses, we decided to put a spin on a traditional Gazpacho and add chickpeas (aka garbanzo beans). Chickpeas (and all pulses for that matter — think black beans, lentils, dry peas and beans) contain a whopping 9 grams of protein per ½ cup. They are also jam packed with fiber, which studies suggest can help to lower cholesterol levels, keep you feeling full and prevent constipation.

    It’s no secret that we’re a fan of pulses. That’s why we’re taking the Pulse Pledge — a commitment to eat more nutritious, delicious and sustainable pulses this year — and we’d love for you to join us!

    We totally think this soup is worth making, so get the ingredients to give it a go. If you try it, let us know in the comments below what you think. Anything different you would add here or do differently? We want to know!

    Print
    Chickpea Gazpacho
    Servings: 2
    Ingredients
    Roasted Chickpeas
    • 3/4 cup of cooked chickpeas
    • 1 teaspoon of paprika
    • Salt and pepper to taste
    Soup
    • 1/2 yellow pepper
    • 1/2 large cucumber
    • 3 small tomatoes, heirloom a plus
    • 1/2 cup of cooked chickpeas
    • 1 clove of garlic
    • 2 tablespoons of olive oil
    • 1/4 avocado
    • Salt, to taste
    Optional toppings
    • 5 cherry tomatoes
    • Small bunch of cilantro
    Instructions
    1. Start by preheating the oven to 400F
    2. Rinse cooked chickpeas with water and then pat dry with a towel a couple of times to drain any excess liquid and make for better roasting
    3. In a bowl, combine beans with salt and pepper and paprika. Stir.
    4. Then add beans to a baking sheet and bake for 20-30 minutes or until the chickpeas are crunchy. We recommend flipping halfway through to make sure they cook evenly.
    5. Now we'll make the soup. Place all soup ingredients in the blender and blend away until you get a creamy consistency.
    6. You can either chill for an hour or serve immediately.
    7. Top the gazpacho with roasted chickpeas, sliced cherry tomatoes and cilantro.

     This post was created in collaboration with USAPulses & PulseCanada

    Filed Under: Appetizers, Salads, Sides

    2016 Runaway Retreat in Runaway Bay, Jamaica

    July 19, 2016 by Jessica 5 Comments

    Sign up for the next one! 


     [line]

    So Jamaica happened. And it was miraculous. We went in expecting to meet some cool people, teach workshops on nutrition, and have a fun time. Nope. This trip was so much more. We couldn’t have asked for a group of more amazing women. Everyone agreed that the experience was transformative. From the beach yoga to the rooftop Jamaican dancehall session, to the rainforest hikes, and the organic farm tours with farm-to-table dinners, this trip literally took our breath away. Not to mention the amazing Runaway Bed & Breakfast, and it’s amazing hosts Jeff and Kalisa (who is a trained chef, cooked ALL of our mouthwatering meals from scratch — that’s right- breakfast, lunch, dinner, dessert, and snacks daily). Here is the photo diary of the trip! 

    First stop: the beach! As soon as our ladies arrived, we had them picked up and taken straight to the beach to meet us for lunch and sandy strolls. It literally felt like we all knew each other from way back when.

    Next we brought the participants to the Runaway Bed & Breakfast, so they could settle into their home for the next 5 days. Here are a few photos of the space


    As we mentioned previously, French culinary trained chef, Kalisa, prepared EVERY meal and snack from scratch that we had during our stay. She even did a couple of cooking demos and made dessert every night

    One the first night, we had a welcome ceremony and gave all of the participants a goodie bag that was stuffed with goodies from our retreat sponsors (more on our amazing sponsors below!) 

    The next morning was beach yoga with our instructor Kayla Hanson 

    Then it was time for the first of four nutrition workshops: Wellness and Weight  Management

    Later that day we hit up Cranbrook, a gorgeous rainforest garden, for a nature hike

    That night, Wendy led a nutrition workshop on The Power of Plant Based Eating

    Next up? Morning hike with the crew

    Then we were ready for some adventure and cliff jumping…so jumping off of cliffs we go! 

    And then there was the private rooftop Jamaican dancehall class (taught by Myers Fitness Center) that probably had us burning 1000 calories in an hour


    That same day we did two more nutrition presentations on the roof with the crew: the first was How to Master Mindful Eating and then Eating for a Healthy Gut

    Then there was the organic farm tour and farm-to-table dinner with Lisa and Chris from Stush in the Bush.


    And we woke up at 5:30 am on the last day for a magical water aerobics class with Champayne and the neighborhood elders in the ocean


    Overall, 5 days of pure joy, magic, rest, and adventure. Interested in coming to our next annual retreat? Make sure to sign up for the waiting list HERE, and we’ll send you an email as soon as we announce upcoming retreats (the next location is going to be EPIC!!!) 

    A special thanks to:

    • Jeff and Kalisa, the hostesses with the mosteses from The Runaway Jamaica
    • Kat Noel, our BFF/retreat coordinator who made sure everything ran smoothly
    • Our retreat photographer, Tiani Wright, who took gorgeous photos of the retreat from start to finish
    • Our amazing sponsors, who believed in our mission and donated all sorts of goodies for our participants
      Nubian Heritage 
      Pontie Wax 
      Miss Rizos 
      Taza Chocolate 
      SIGG North America 
      Synergy Organic Clothing 
      Bark Thins 
      Thrive Market
      California Walnuts 

    Filed Under: Retreats, Travel

    Almond Pumpkin Seed Coconut Granola

    June 29, 2016 by Jessica 7 Comments

    A few weeks ago we hosted an epic retreat in Jamaica at The Runaway BnB. We were so inspired by all of the native flavors of the island, we figured we had to create a series of recipes using fresh, local produce. 

    This granola recipe was created by Kalisa Martin, the co-founder and executive chef at The Runaway Jamaica. Kalisa was thrilled to use coconut as the base for this recipe because it is native to the island of Jamaica. In addition to coconut, she added ginger to the granola, which gave it a spicy tang and has health properties, too. Some studies suggest ginger may provide relief for gastrointestinal distress. In fact, we regularly recommend ginger to our patients with nausea and morning sickness. Unlike many granola recipes, Kalisa’s cereal provides a balance of carbohydrates and protein. She made sure to add pumpkin seeds and almonds to balance out the oats in this recipe. We paired this granola with a few slices of fresh papaya, which are also included in the Nubian Heritage line. This was the perfect balance of soft and crunchy, which can be enjoyed as a cereal or a snack. So, what are you waiting for? Go ahead and give this recipe a try and let us know what you think. Until next time!
    Print
    Almond Pumpkin Seed Coconut Granola
    Servings: 16
    : Kalisa Martin from The Runaway Jamaica
    Ingredients
    • 3 cups old-fashioned rolled oats
    • 1 cup unsweetened coconut flakes
    • 1 cup slivered almonds
    • 1/3 cup pumpkin seeds
    • 3/4 teaspoon salt
    • 1/3 cup + 2 tablespons raw or brown sugar
    • 1/4 teaspoon ground cinnamon
    • 1 teaspoon ground ginger
    • 1/4 cup + 2 tablespoons honey
    • 2 tablespoons cold pressed coconut oil
    • 1 large egg white
    Instructions
    1. Preheat oven to 300 degrees
    2. In a large bowl, combine the first 10 ingredients and mix thoroughly.
    3. In a small bowl, whisk the egg white until frothy, then stir into the granola mixture.
    4. Spread granola in a single layer on a baking sheet. Bake 35-40 minutes. At the 15 minute mark and the 30 minute mark, use spatula to gently flip granola and rotate the pan.
    5. The granola is finished when it's evenly golden brown. Remove the pan from the oven and cool completely on cooling rack. Break into clusters and store in an airtight container.

    Filed Under: Breakfast

    Mango Chia Seed Pudding

    June 8, 2016 by Jessica 8 Comments

    Last week, we hosted an absolutely gorgeous retreat in Jamaica at The Runaway BnB. We were so inspired by all of the native flavors of the island, we figured we had to create a series of recipes using fresh, local produce.

    This pudding is a great yogurt alternative for all of our dairy free friends. We figured chia seeds would be perfect to pair with the sweet, tropical mango. We couldn’t decide what to top the pudding with, so we gave you two options (both dairy free as well). The first is slivered almonds, which provide a fun crunch and punch of protein. The second option is coconut cream, perfect for those of you who are going to eat this pudding as a dessert.

    We promise that this pudding will rock your socks — we gave it to the camera crew and 3 of our friends in Jamaica and they loved it. You can make a bunch of variations of this recipe as well. For example, you can use berries instead of mango, which will be just as delicious. If you try this recipe, make sure to let us know what fruit and nut variations you use in the comments below. Stay tuned for part two and three of our Jamaica  recipe series! Here’s the full video for how to make this beauty: 

    Print
    Mango Chia Seed Pudding
    Servings: 4
    Ingredients
    • 1 small to medium mango
    • 1/2 cup of chia seeds
    • 2 cups of unsweetened almond milk
    • 1 tablespoon of honey
    • Optional: 2 tablespoons of slivered almonds OR coconut cream
    Instructions
    1. We'll start by peeling the mango and then chopping into cubes (don't worry, it doesn't have to be pretty because we'll be tossing it in the blender).
    2. Next, add the mango, honey and almond milk to a blender and blend away until smooth
    3. Add the almond milk blend to a large bowl, glass, or jar, then stir in the chia seeds
    4. Mix well until the chia seeds are evenly dispersed
    5. Place the chia pudding in the fridge. Let it sit for at least 1 hour- you can also leave it overnight if you want it extra firm
    6. Once pudding is firm, scoop one serving into a bowl, then top with either slivered almonds or whipped coconut cream (to make this, add two tablespoons of coconut cream into a small bowl and whisk with a fork until it resembles "whipped cream")

    Filed Under: Sweets

    How to Start a Food & Nutrition Blog

    May 15, 2016 by Jessica 25 Comments

    One of the questions we get asked most frequently is how in the heck do you start a food and nutrition blog. Since we’ve been doing this for 5 years, we have a ton of advice that we want to share with you. We hope this information will help you start your very own food and nutrition blog! 

    But first, let’s go on a little trip down memory lane. In 2011, we started our healthy cooking web-series, known at the time as “Healthy Kitchen Chronicles: Food Heaven Made Easy with Wendy and Jess.” (We’ve since dropped the “Healthy Kitchen Chronicles” — a bit long, much?) Our good friend, Stephanie Mathews designed our funky fresh logo and background collage, and we (not designers), chose a simple theme in WordPress. Here’s what it looked like: 

    2011 Website:

    In 2013, we realized it was time for a facelift. Our friend Hey Fran Hey put us on to the magic of Krystle from Kriss Did It, a fiercely fabulous designer who helps women elevate their brand by creating beautiful websites. Krystle (also known as Kriss) recently re-designed Marie Forleo’s new site, so she is as LEGIT as they come (and in high demand). Here is the 2013 version of our site, which we absolutely loved: 

    2013 Website: 


    So flash forward to 2015, when we felt it was time for another makeover. We wanted a bit more grown, clean, fem, fresh nature-y website look. We hired a team help us create a new website that represents our growth and simple food vibe. We’ll explain in more detail later (exactly who did what, in case you want to try to hire them for your site too), but here is the current look: 

    2015 Website (current)

    Now your turn…

    So how do you go about creating a food and nutrition blog that you love? Here is our step-by-step guide to what we recommend.

    Step 1: Choose a name, focus and angle.

    First things first, you’ll need to decide what your blog will be about and what it will be called. If you are focusing on recipes, decide what your angle will be. Since Wendy and I are both vegetarian, we decided to focus on vegetarian recipes that feature plant-based foods. If you are a dietitian, maybe you want to focus solely on nutrition articles, and less on recipes. That works too! Just try to be as specific as possible so the content you are developing is relevant to your focus. It may also be helpful to decide who your reader will be. Visualize them and even consider writing down some of their characteristics. If Wendy and I were to write down our reader, she (our readers are 99% female) would be a healthy woman who is strapped for time and wants to eat better, but not spend hours in the kitchen. She wants her meals simple, FLAVORFUL, and cost-effective. Who is your reader?

    Step 2: Purchase a domain name and hosting service.

    Once you have your name down, you’ll need to secure it by purchasing the domain name and choosing a web hosting platform. We have been using bluehost for the past 5 years and love them. It’s great because you can purchase both the domain name AND hosting from the same place.

    Each year, they send us an email with the option to auto-renew, so you don’t even have to think about it. The pricing is reasonable and they have customer support via phone and online chat. You’ll also get to create multiple email accounts using their service. Here are the plans and pricing. When we first started out, we chose the basic plan, but we have since upgraded to the pro plan, since we have tons of posts and we want our site to function at an optimal speed.

    Step 3: Create a design lookbook.

    Now this is the FUN part. What do you want your blog to look like? Do you want it to have bold or soft colors. Do you want it to have white space or a pattern as the background. We recommend you start by going through pinterest to create a “lookbook” for your site. Pin styles and designs that resonate with you.

    Here is a peak of a mood board created by our current designer:

    Make sure that all of your social media posts fall within your lookbook as well. If your website consists of soft colors with more white space, it helps if your Instagram showcases photos that have the same vibe. 

    Step 4: Choose a designer and/or a theme.

    Once you have a lookbook in place, it’s time to find a designer and/or a theme for your site. There are a couple of ways to go about this. If money isn’t an issue, we absolutely recommend finding a designer that you love, and have them create the whole site for you. This can easily cost upwards of $5,000+, so make sure you save up if you want to use this option. Remember, you get what you pay for. A well designed site will cost you money, but the payoff is absolutely priceless. Some of our favorite designers that we have worked with include Kriss of Kriss Did It, Samantha of Revamp Amor and Amanda of Amanda George.com (she helped me with Jessica Jones Nutrition). If you are just starting out, the more cost effective way is to go to Creative Market  or a similar site, find a theme you love (make sure it’s compatible with your hosting site), and have a developer implement it. How do you find a developer? We’ve used Upwork to find tons of contractors, including developers, and our experience has been awesome. Once your theme is connected to WordPress (or whatever other site you choose to go with), you’ll also want to connect it to the hosting service you purchased. We don’t know how to implement or connect anything, so we hired a developer to help us do this. BUT, if you are a DIY kind of person then you can watch this video on exactly how to connect these two here. After the theme is installed, you can have designers customize it into what you want it to look like. All of our icons and covers were custom designed by one of the three ladies we mentioned above. 

    Step 5: Consider having a photoshoot.

    This may not be something that you have a budget for right now, but we can’t stress how important it is to have beautiful custom photos. Yes, you may have to pay the photographer a couple of hundred dollars (typically $100 per hour is what we have found), BUT this will take your blog from 0 to 100 real quick. Let the photographer know what look you are going for and have locations ready to go (for example, if you are a food blogger, do you need a photo of yourself in the kitchen for your “about me” page?) Professional photos go a long way. Take a look at Abbey Sharp for example. She is a dietitian foodie with a blog and YouTube channel who we featured on our dietitian spotlight page. Her INCREDIBLE pictures were one of the first things that drew us in. It is an initial investment, but believe us when we say it is 100% worth it.

    You  might want to also consider buying a few cute outfits (we love Asos.com) and getting your makeup done the day of the shoot. Wendy and I rarely wear more than lipstick, but we find that we usually look washed out in photos and videos if we don’t have any makeup on at all. For this reason, when we did our site redesign in 2015, we hired a make-up artist to help us look fresh and clean for the photos. If you aren’t able to do this at first, that’s okay too. Maybe have a friend take a few pics and save up for some professional ones down the line as your blog and business grows.  Here are the photographers we used in case you are based in NY (Bitnara S.) or CA (Zia K.) – they were both amazing to work with.

    Step 6: Create great content.

    This is the BULK of what you will be doing now that you have your food and nutrition blog. Since you know what you want to focus on, start creating! You’ll want the content to be great, because great content gets shared, which helps with getting it ranked higher in the search engines. Remember that if you are a Registered Dietitian, you are the authority on nutrition topics. Create articles that people will find helpful, or answer questions they have always been wondering (for example: what to eat after a workout? how to eat more plant based, etc).  When creating nutrition articles, we like to use PubMed to do background research on the topic. The Academy of Nutrition and Dietetics also has good position papers that can be helpful. A detailed article will usually be 500 to 1000 (or more) words, so be ready to write your heart out. If you are creating mostly recipes, you’ll want to get a good camera and lens. Wendy and I both started out with this Canon DSLR camera and this lens for our food photos. (Note: there are a LOT of better cameras out there, but a better camera is more $$. Decide how much you want to spend and do your research to find a good food photography camera and lens in that price point). Wendy shoots most of the recipes now, and uses a Canon EOS 5D Mark III camera. She uses both the Canon 50mm f/1.4 and the 100mm f/2.8L lenses. These are definitely more expensive than the cameras we started out using, but it’s totally worth the investment if this is something you take seriously. If you’re not too experienced with cameras, try out a more cost-effective DSLR and then you can move up to something fancier. 

    You might want to also consider creating a posting schedule. For example, every Monday you will post a recipe and every Friday you will post a nutrition article. You may even go farther and decided that the first Monday of the month will be a dessert, the second Monday will be an entree, the third will be an appetizer and so on. If it helps, write this posting schedule out and keep it somewhere handy.

    Step 7: If shooting recipes, learn how to use the camera.

    This took us years to finally get the hang of. You’ll want to invest a lot of time in learning how to use your digital camera to take beautiful photos. The main thing you will need is good NATURAL LIGHT. Natural light is 10000% better than any other kind of light, especially for taking food photos. We found this awesome (affordable) online food photography school by the Minimalist Baker (complete with 130+ videos) that will help you learn the ropes from a pro.

    The key here is to practice, practice, practice. If you take a look at some of our older recipes, you’ll see a HUGE difference in quality. The only way to learn, is to dedicate time and patience. You’ll also want to buy cute props for taking your recipe photos. For example, get a set of plates, cutting boards bowls, napkins, cups, etc., that will make your photos pop. Our top picks are Ross, thrift shops (the BEST!), Crate & Barrel, Williams-Sonoma, Marshall’s,TJ Maxx and HomeGoods. 

    Step 8: Create a mailing list and build your newsletter subscribers.

    Building a mailing list is super important when it comes to growing your blog. We use mailchimp as our newsletter host and love it. It’s very user friendly and easy to customize.


    They let you send up to 12,000 monthly emails to 2,000 subscribers for free, and then the cost increases from there as your subscriber list grows (once you get over 15,000 subscribers, it’s not the cheapest). I’m sure there are cheaper mailing lists out there, but we just can’t seem to find anything that is as straightforward and easy to use as mailchimp, so we stick with it. 

    Now, what can you do to get more email subscribers? Create a FREE product to give out to your list. We created our free smoothie ebook here.

    When someone new comes to our site, our newsletter pop up asks people if they want to join our site and get a free copy of our 7 Days of Smoothies Ebook. We can’t tell you how much this has helped us increase our newsletter subbies. We doubled our subscriber list in less than 6 month by creating the giveaway.

    Step 9: Get on social media, now!

    Social media is everything, as far as your blog is concerned. Now, you don’t have to be on ALL social media channels. Maybe pick 2 to 4 that resonate with you. Social media is a great way to drive people to your amazing content. Each post should redirect back to your site, so your readers can see all of the content you’ve created. We’re on Facebook, Instagram, Twitter and Tumblr, and Pinterest. If you need help managing your social media accounts, Hootsuite is great for allowing you to schedule posts and post on more than one platform at a time.


    Okay, now that we outlined all of the steps that it takes to start your very own food and nutrition blog, it’s time to GET STARTED. If your a dietitian like us, you are probably a type A personality and feel like everything has to be PERFECT before getting started. Don’t do this. Start with what you can do now. At a minimum, you will have to get the domain name and hosting, buy a theme (these are as low as $20, you can also get a FREE wordpress theme here), and get to bloggin’. All of the other stuff can come with time (seriously, it took us almost 5 years to get where we are).

    We hope this post helps you in your journey. Feel like we missed something? Let us know in the comments, and make sure to leave a link for the blog you are working on. We love to see what you guys and gals are up to!

    Until next time,

    xo

    Jess

    [line]

    **Please note that this post does contain affiliate links, which means if you purchase a few select products we mention in this article we get a small percentage of the sale, which helps us keep our content free on Food Heaven Made Easy.

    Filed Under: Resources

    • « Go to Previous Page
    • Page 1
    • Interim pages omitted …
    • Page 12
    • Page 13
    • Page 14
    • Page 15
    • Page 16
    • Interim pages omitted …
    • Page 36
    • Go to Next Page »

    Primary Sidebar

    Search

    Let’s Connect

    Meet Wendy & Jess

    Registered Dietitians & BFF's. We're probably busy eating right now.

    Subscribe to our Podcast

    food heaven podcast

    Podcast Hookup Codes

    food heaven podcast hookup codes

    Meet Wendy & Jess

    Registered Dietitians & BFF's. We're probably busy eating right now.

    • Diabetes Digital
    • Our Story
    • Recipes
    • Resources
    • Articles
    • Contact
    • Policies
    © Food Heaven Made Easy
    In order to provide you with the best service, our website uses cookies. By continuing to browse the site you are agreeing to our Privacy Policy I consent
    Privacy Policy

    Privacy Overview

    This website uses cookies to improve your experience while you navigate through the website. Out of these cookies, the cookies that are categorized as necessary are stored on your browser as they are essential for the working of basic functionalities of the website. We also use third-party cookies that help us analyze and understand how you use this website. These cookies will be stored in your browser only with your consent. You also have the option to opt-out of these cookies. But opting out of some of these cookies may have an effect on your browsing experience.
    Necessary
    Always Enabled
    Necessary cookies are absolutely essential for the website to function properly. This category only includes cookies that ensures basic functionalities and security features of the website. These cookies do not store any personal information.
    Non-necessary
    Any cookies that may not be particularly necessary for the website to function and is used specifically to collect user personal data via analytics, ads, other embedded contents are termed as non-necessary cookies. It is mandatory to procure user consent prior to running these cookies on your website.
    SAVE & ACCEPT