One of the questions we get asked most frequently is how in the heck do you start a food and nutrition blog. Since we’ve been doing this for 5 years, we have a ton of advice that we want to share with you. We hope this information will help you start your very own food and nutrition blog!
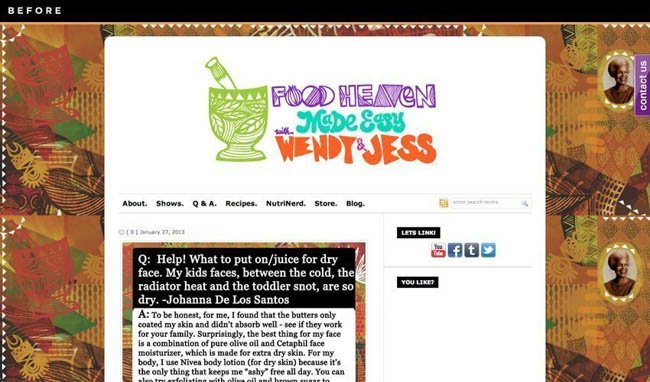
But first, let’s go on a little trip down memory lane. In 2011, we started our healthy cooking web-series, known at the time as “Healthy Kitchen Chronicles: Food Heaven Made Easy with Wendy and Jess.” (We’ve since dropped the “Healthy Kitchen Chronicles” — a bit long, much?) Our good friend, Stephanie Mathews designed our funky fresh logo and background collage, and we (not designers), chose a simple theme in WordPress. Here’s what it looked like:
2011 Website:
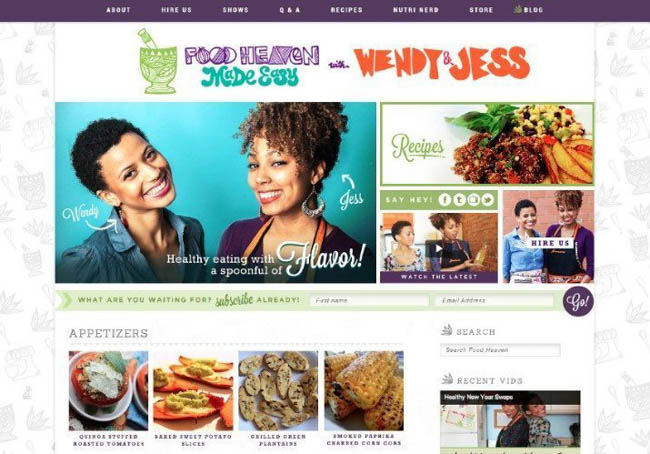
In 2013, we realized it was time for a facelift. Our friend Hey Fran Hey put us on to the magic of Krystle from Kriss Did It, a fiercely fabulous designer who helps women elevate their brand by creating beautiful websites. Krystle (also known as Kriss) recently re-designed Marie Forleo’s new site, so she is as LEGIT as they come (and in high demand). Here is the 2013 version of our site, which we absolutely loved:
2013 Website:
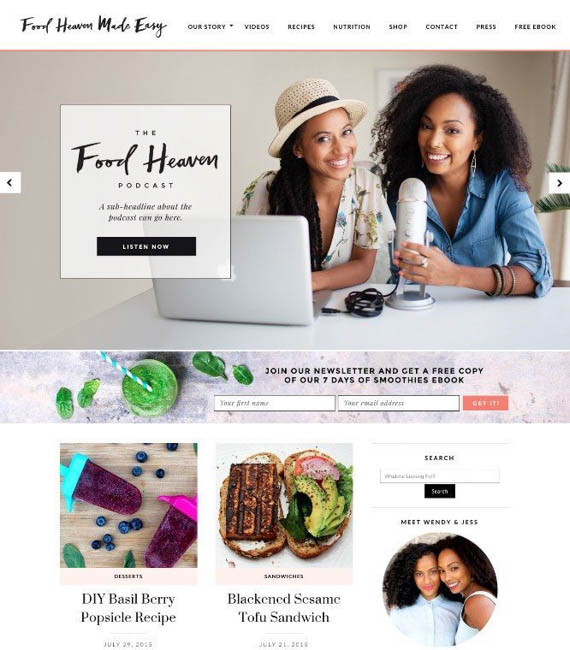
So flash forward to 2015, when we felt it was time for another makeover. We wanted a bit more grown, clean, fem, fresh nature-y website look. We hired a team help us create a new website that represents our growth and simple food vibe. We’ll explain in more detail later (exactly who did what, in case you want to try to hire them for your site too), but here is the current look:
2015 Website (current)
Now your turn…
So how do you go about creating a food and nutrition blog that you love? Here is our step-by-step guide to what we recommend.
Step 1: Choose a name, focus and angle.
First things first, you’ll need to decide what your blog will be about and what it will be called. If you are focusing on recipes, decide what your angle will be. Since Wendy and I are both vegetarian, we decided to focus on vegetarian recipes that feature plant-based foods. If you are a dietitian, maybe you want to focus solely on nutrition articles, and less on recipes. That works too! Just try to be as specific as possible so the content you are developing is relevant to your focus. It may also be helpful to decide who your reader will be. Visualize them and even consider writing down some of their characteristics. If Wendy and I were to write down our reader, she (our readers are 99% female) would be a healthy woman who is strapped for time and wants to eat better, but not spend hours in the kitchen. She wants her meals simple, FLAVORFUL, and cost-effective. Who is your reader?
Step 2: Purchase a domain name and hosting service.
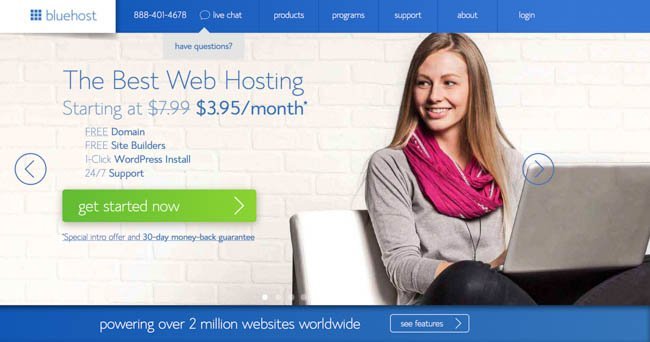
Once you have your name down, you’ll need to secure it by purchasing the domain name and choosing a web hosting platform. We have been using bluehost for the past 5 years and love them. It’s great because you can purchase both the domain name AND hosting from the same place.
Each year, they send us an email with the option to auto-renew, so you don’t even have to think about it. The pricing is reasonable and they have customer support via phone and online chat. You’ll also get to create multiple email accounts using their service. Here are the plans and pricing. When we first started out, we chose the basic plan, but we have since upgraded to the pro plan, since we have tons of posts and we want our site to function at an optimal speed.
Step 3: Create a design lookbook.
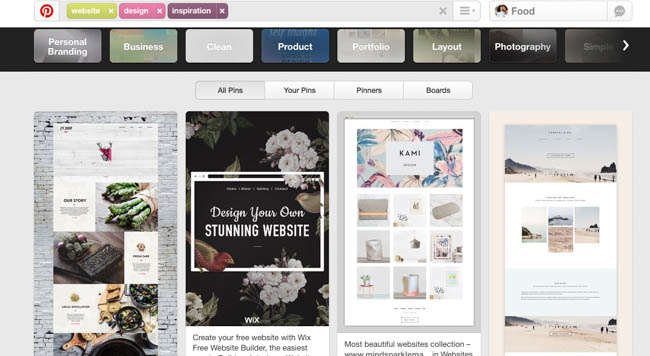
Now this is the FUN part. What do you want your blog to look like? Do you want it to have bold or soft colors. Do you want it to have white space or a pattern as the background. We recommend you start by going through pinterest to create a “lookbook” for your site. Pin styles and designs that resonate with you.
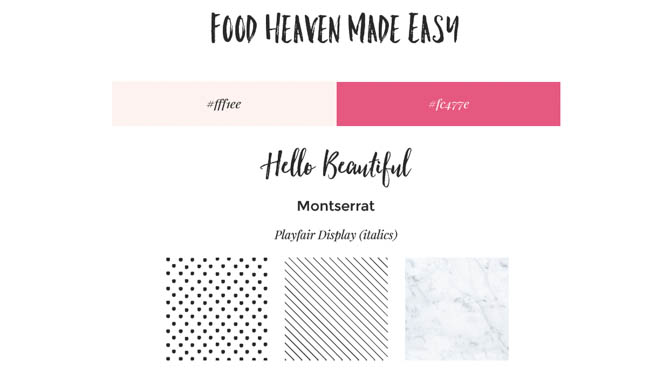
Here is a peak of a mood board created by our current designer:
Make sure that all of your social media posts fall within your lookbook as well. If your website consists of soft colors with more white space, it helps if your Instagram showcases photos that have the same vibe.
Step 4: Choose a designer and/or a theme.
Once you have a lookbook in place, it’s time to find a designer and/or a theme for your site. There are a couple of ways to go about this. If money isn’t an issue, we absolutely recommend finding a designer that you love, and have them create the whole site for you. This can easily cost upwards of $5,000+, so make sure you save up if you want to use this option. Remember, you get what you pay for. A well designed site will cost you money, but the payoff is absolutely priceless. Some of our favorite designers that we have worked with include Kriss of Kriss Did It, Samantha of Revamp Amor and Amanda of Amanda George.com (she helped me with Jessica Jones Nutrition). If you are just starting out, the more cost effective way is to go to Creative Market or a similar site, find a theme you love (make sure it’s compatible with your hosting site), and have a developer implement it. How do you find a developer? We’ve used Upwork to find tons of contractors, including developers, and our experience has been awesome. Once your theme is connected to WordPress (or whatever other site you choose to go with), you’ll also want to connect it to the hosting service you purchased. We don’t know how to implement or connect anything, so we hired a developer to help us do this. BUT, if you are a DIY kind of person then you can watch this video on exactly how to connect these two here. After the theme is installed, you can have designers customize it into what you want it to look like. All of our icons and covers were custom designed by one of the three ladies we mentioned above.
Step 5: Consider having a photoshoot.
This may not be something that you have a budget for right now, but we can’t stress how important it is to have beautiful custom photos. Yes, you may have to pay the photographer a couple of hundred dollars (typically $100 per hour is what we have found), BUT this will take your blog from 0 to 100 real quick. Let the photographer know what look you are going for and have locations ready to go (for example, if you are a food blogger, do you need a photo of yourself in the kitchen for your “about me” page?) Professional photos go a long way. Take a look at Abbey Sharp for example. She is a dietitian foodie with a blog and YouTube channel who we featured on our dietitian spotlight page. Her INCREDIBLE pictures were one of the first things that drew us in. It is an initial investment, but believe us when we say it is 100% worth it.
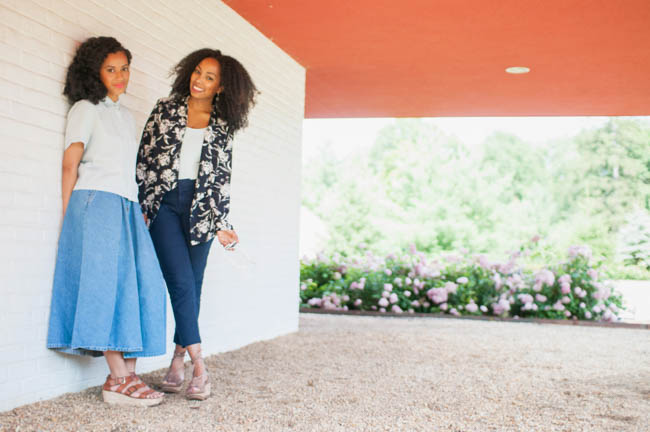
You might want to also consider buying a few cute outfits (we love Asos.com) and getting your makeup done the day of the shoot. Wendy and I rarely wear more than lipstick, but we find that we usually look washed out in photos and videos if we don’t have any makeup on at all. For this reason, when we did our site redesign in 2015, we hired a make-up artist to help us look fresh and clean for the photos. If you aren’t able to do this at first, that’s okay too. Maybe have a friend take a few pics and save up for some professional ones down the line as your blog and business grows. Here are the photographers we used in case you are based in NY (Bitnara S.) or CA (Zia K.) – they were both amazing to work with.
Step 6: Create great content.
This is the BULK of what you will be doing now that you have your food and nutrition blog. Since you know what you want to focus on, start creating! You’ll want the content to be great, because great content gets shared, which helps with getting it ranked higher in the search engines. Remember that if you are a Registered Dietitian, you are the authority on nutrition topics. Create articles that people will find helpful, or answer questions they have always been wondering (for example: what to eat after a workout? how to eat more plant based, etc). When creating nutrition articles, we like to use PubMed to do background research on the topic. The Academy of Nutrition and Dietetics also has good position papers that can be helpful. A detailed article will usually be 500 to 1000 (or more) words, so be ready to write your heart out. If you are creating mostly recipes, you’ll want to get a good camera and lens. Wendy and I both started out with this Canon DSLR camera and this lens for our food photos. (Note: there are a LOT of better cameras out there, but a better camera is more $$. Decide how much you want to spend and do your research to find a good food photography camera and lens in that price point). Wendy shoots most of the recipes now, and uses a Canon EOS 5D Mark III camera. She uses both the Canon 50mm f/1.4 and the 100mm f/2.8L lenses. These are definitely more expensive than the cameras we started out using, but it’s totally worth the investment if this is something you take seriously. If you’re not too experienced with cameras, try out a more cost-effective DSLR and then you can move up to something fancier.
You might want to also consider creating a posting schedule. For example, every Monday you will post a recipe and every Friday you will post a nutrition article. You may even go farther and decided that the first Monday of the month will be a dessert, the second Monday will be an entree, the third will be an appetizer and so on. If it helps, write this posting schedule out and keep it somewhere handy.
Step 7: If shooting recipes, learn how to use the camera.
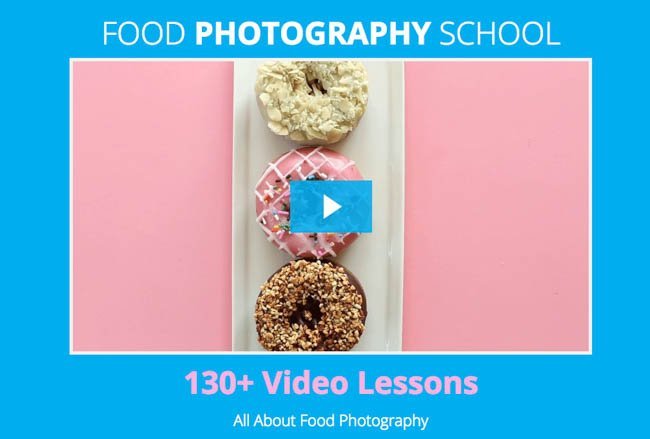
This took us years to finally get the hang of. You’ll want to invest a lot of time in learning how to use your digital camera to take beautiful photos. The main thing you will need is good NATURAL LIGHT. Natural light is 10000% better than any other kind of light, especially for taking food photos. We found this awesome (affordable) online food photography school by the Minimalist Baker (complete with 130+ videos) that will help you learn the ropes from a pro.
The key here is to practice, practice, practice. If you take a look at some of our older recipes, you’ll see a HUGE difference in quality. The only way to learn, is to dedicate time and patience. You’ll also want to buy cute props for taking your recipe photos. For example, get a set of plates, cutting boards bowls, napkins, cups, etc., that will make your photos pop. Our top picks are Ross, thrift shops (the BEST!), Crate & Barrel, Williams-Sonoma, Marshall’s,TJ Maxx and HomeGoods.
Step 8: Create a mailing list and build your newsletter subscribers.
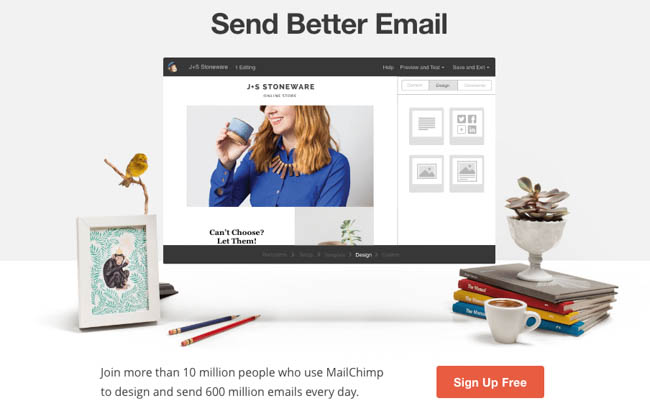
Building a mailing list is super important when it comes to growing your blog. We use mailchimp as our newsletter host and love it. It’s very user friendly and easy to customize.
They let you send up to 12,000 monthly emails to 2,000 subscribers for free, and then the cost increases from there as your subscriber list grows (once you get over 15,000 subscribers, it’s not the cheapest). I’m sure there are cheaper mailing lists out there, but we just can’t seem to find anything that is as straightforward and easy to use as mailchimp, so we stick with it.
Now, what can you do to get more email subscribers? Create a FREE product to give out to your list. We created our free smoothie ebook here.
When someone new comes to our site, our newsletter pop up asks people if they want to join our site and get a free copy of our 7 Days of Smoothies Ebook. We can’t tell you how much this has helped us increase our newsletter subbies. We doubled our subscriber list in less than 6 month by creating the giveaway.
Step 9: Get on social media, now!
Social media is everything, as far as your blog is concerned. Now, you don’t have to be on ALL social media channels. Maybe pick 2 to 4 that resonate with you. Social media is a great way to drive people to your amazing content. Each post should redirect back to your site, so your readers can see all of the content you’ve created. We’re on Facebook, Instagram, Twitter and Tumblr, and Pinterest. If you need help managing your social media accounts, Hootsuite is great for allowing you to schedule posts and post on more than one platform at a time.
Okay, now that we outlined all of the steps that it takes to start your very own food and nutrition blog, it’s time to GET STARTED. If your a dietitian like us, you are probably a type A personality and feel like everything has to be PERFECT before getting started. Don’t do this. Start with what you can do now. At a minimum, you will have to get the domain name and hosting, buy a theme (these are as low as $20, you can also get a FREE wordpress theme here), and get to bloggin’. All of the other stuff can come with time (seriously, it took us almost 5 years to get where we are).
We hope this post helps you in your journey. Feel like we missed something? Let us know in the comments, and make sure to leave a link for the blog you are working on. We love to see what you guys and gals are up to!
Until next time,
xo
Jess
[line]
**Please note that this post does contain affiliate links, which means if you purchase a few select products we mention in this article we get a small percentage of the sale, which helps us keep our content free on Food Heaven Made Easy.


I loved this post!! thank you, thank you! though my blog is not a food one, I do have healthy posts at times. I’m not sure what I could give away for free yet (in order to build my list) but I think I need to narrow down my market. I want men to read my blog because I do feel like it’s applicable, but I do think it would appeal more to a woman. All part of the process lol. Thanks again!! and i would love your feedback if you ever have a moment.
xo, Shaloma – http://www.talltalesandfancy.com
So helpful! I’m a fellow RD, turned stay at home mom, turned blogger by night. This is extremely helpful! Thank you for sharing and I love your site!
Brynn at http://www.thedomesticdietitian.com
Thank you!! xo
Great post! Im a college student and i’ve been wanted to start a blog as a hobby since adopting a plant based diet for about two years now. I will definitely use these tips, however I’m sill stuck on a name..that’s been the hardest part for me. Any more tips?!
Check out this article! http://www.blogclarity.com/the-guide-to-choosing-a-blog-name-you-wont-regret-part-1/
It’s already been WAY beyond after I’ve started a blog, but a lot of people who want to start a blog can learn so much from this post! 🙂
Aw thanks so much!!
Excellent article with lots of info. I started my site back in 2005 and it has gone thru so many changes. It is an ongoing business but so rewarding to call it your own. Great job.
Thanks for stopping by Malena! It’s so rewarding to be an entrepreneur with purpose
Great post- your current website is gorgeous. I’m totally interested in learning more about food photography 🙂
thanksss!
Hello Wendy & Jess,
Thank you so much for the actionable steps you’ve provided! I noticed that your Bluehost affiliate link is not working and I’d love to use it for a website launch in October. I’ve been following your posts for a few months and appreciate the value you consistently give. Shopping your links is the least I can do to say thank you. Blessings. xo
Hi Regina! Sorry for the late reply. We actually switched over to GoDaddy, and have to update our affiliate links to reflect that. Hope the website launch went great!
Thank you so much for this post! All of these tips are surely going to help me out in future when I start my own nutrition blog! Much love!!
You’re welcome! Good luck with starting it up!
This post is absolutely AMAZING!! Thank you for helping us to see that we too can be a driving force for change in our communities. ?
Glad you enjoyed it Tonya!! Thanks for stopping by and leaving love <3
I am also pursuing Nutrition Course from Chandigarh Group Of Colleges Landran and after reading your article, i also get motivated to write a blog. Thanks for sharing such inspiring article.
cool! thanks for stopping by <3
Thank you so much for sharing this information and resources!! I was at your presentation at Today’s Dietitian in Scottsdale last year and was so inspired after hearing the journey you two are on – you have reminded me to jump right in and get going, thank you!
Ahh that’s so cool!! Glad you’re finding the information helpful
WOW just what I was searching for. Came here by searching for why start a
business online
Thank you for sharing Wendy and Jess. you did have a good start and hope everyone else will too.
Thank you!
Digital marketing is on its peak nowadays. We really need to start blogs with our businesses. Thanks for sharing.