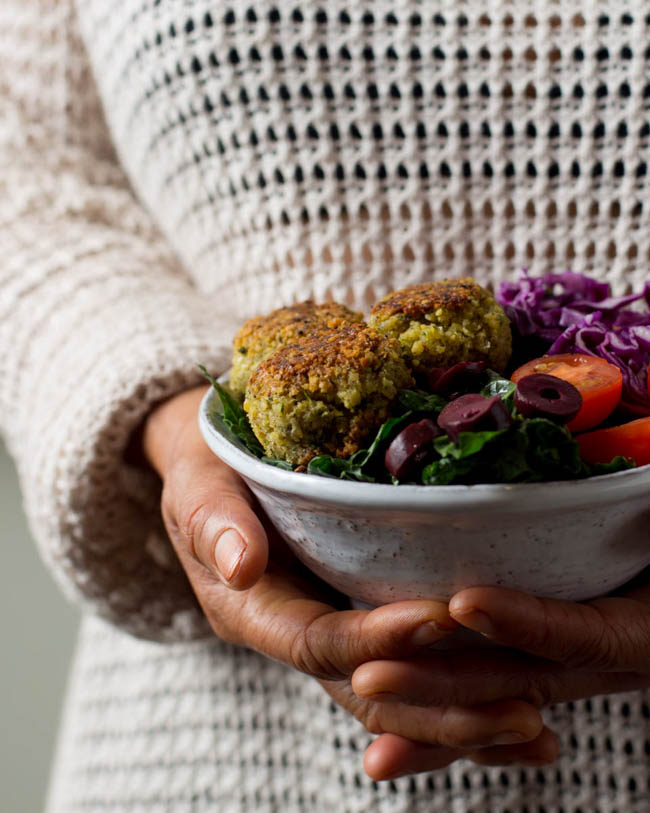
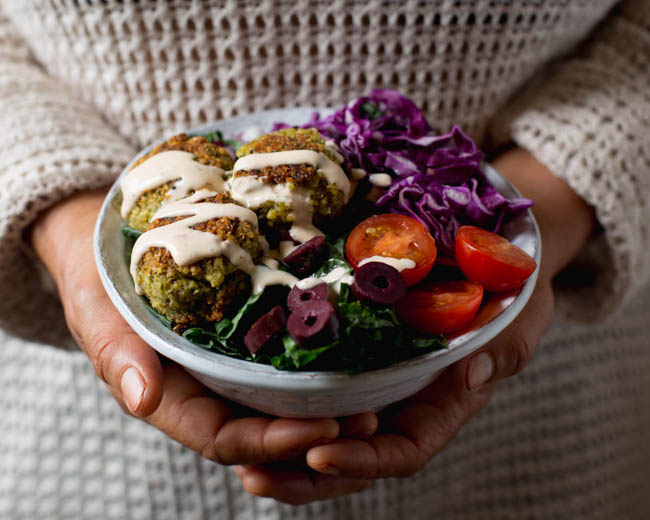
This week we have this delicious baked Crispy Falafel recipe for you. Falafels are packed with flavor and crunch, and I love that you can add them to a salad or pita bread for a complete meal. This alternative uses a combination of pan-frying and baking, and so we’re not using all of the oil that the traditional deep frying method does.
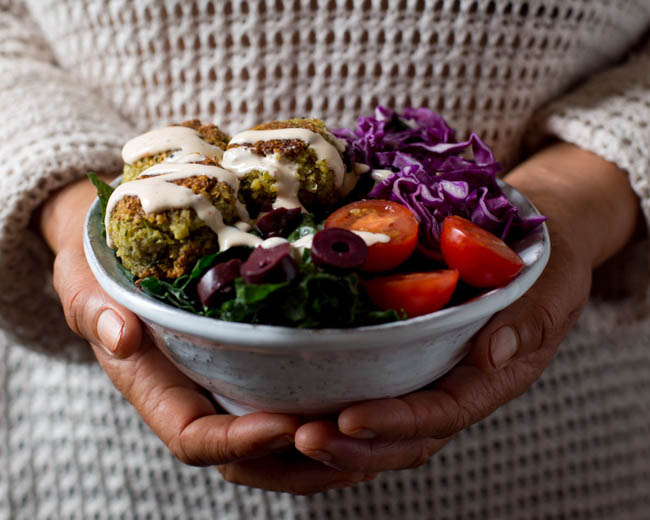
The result is a crispy on the outside, tender on the inside, baked falafel recipe. I kept it very straightforward with the directions- you will be pulsing most of your ingredients, forming balls with your hands, and then getting to work on the stove!
Falafel is made primarily with chickpeas as the base. Chickpeas are super versatile and delicious. They are an excellent source of protein, with 15 grams of protein in just one cup of cooked chickpeas. They are also loaded with iron, folate, and manganese, minerals that will help keep you energized and your body functioning the way that it should!
Let’s get started with this recipe, shall we? Preheat the oven to 400F. Once the chickpeas are done soaking, drain them and rinse with fresh water. Add the soaked chickpeas, parsley, onion, garlic, spices, pepper and salt to a food processor. Pulse a few times, until you have a consistent, coarse texture.
Create 10-12 small falafel balls with your hands. In a medium pan, heat the vegetable oil on the stovetop, and add the falafel balls. I recommend you do this in 2 batches. Cook the falafel balls in the oil for 2 minutes on each side, using a spatula to carefully flip over. Once done, add them to a parchment paper-lined baking dish. Once all the falafels are cooked on the pan and added to the baking dish, drizzle the remaining oil from the pan onto the falafels, and bake for 20 minutes or until browned and crisp. Flip halfway with a spatula.
Enjoy with pita, greens, rice, and/or your favorite pairings! Store leftovers in an airtight container in the fridge, and reheat in the oven until fully heated and crisp on the outside.
We hope you give these a try! Let us know in the comments below how this recipe turns out for you.
- 1 cup dried chickpeas, soaked in water overnight
- 1/2 cup fresh parsley
- 1/2 medium onion chopped
- 3 garlic cloves chopped
- 1 teaspoon cumin
- 1 teaspoon coriander
- 1/4 teaspoon black pepper
- 1 teaspoon salt
- 1/4 cup vegetable oil
-
Preheat the oven to 400F.
-
Once the chickpeas are done soaking, drain them and rinse with fresh water.
-
Add the soaked chickpeas, parsley, onion, garlic, spices, pepper and salt to a food processor. Pulse a few times, until you have a consistent, coarse texture.
-
Create 10-12 small falafel balls with your hands.
-
In a medium pan, heat the vegetable oil on the stovetop, and add the falafel balls. I recommend you do this in 2 batches.
-
Cook the falafel balls in the oil for 2 minutes on each side, using a spatula to carefully flip over. Once done, add them to a parchment paper-lined baking dish.
-
Once all the falafels are cooked on the pan and added to the baking dish, drizzle the remaining oil from the pan onto the falafels, and bake for 20 minutes or until browned and crisp. Flip halfway with a spatula.
-
Enjoy with pita, greens, rice, or your favorite pairings!
You can store leftover falafels in an airtight container for up to 5 days. Reheat in the oven until fully crisp, and enjoy!
Bobriana says
The cucumber salad looks interesting, may I ask what all is in it?
Wendy says
avocado, cucumber, tomato, onion, oil, lime & pepper 🙂
Felicia says
Looks great! Does it have to be cooked chickpeas before forming them? Have you tried this recipe with rinsing canned chickpeas and patting dry? Just wondering (time-saver question:) )
Wendy says
yes they do need to be cooked- these were canned!
alissa says
do you mean cook the canned? if so, how can i do that?
ps. just found your website. i have never gotten excited about internet recipes and/or food pages…..something caught my eye for some reason and i am really enjoying/loving your site! from one veg head to yours, wendy and jess, thank you!!
Wendy says
if it’s canned- rinse and use. if using dry beans, boil until tender and use those. so happy you found us!